
Process Templates give you the opportunity to have all your standardised processes in one place and have the guidelines to follow a very specific company’s procedure.
They can be used when creating a new process of any type or when you are using Quick Adds.
Create a Process Template
- Click Packages Icon > Process Orchestration > Process Templates.
- Then, press on the ‘+’ button to add a new Process Template.
- Fill in the Title of the Process Template and the Basic Info.
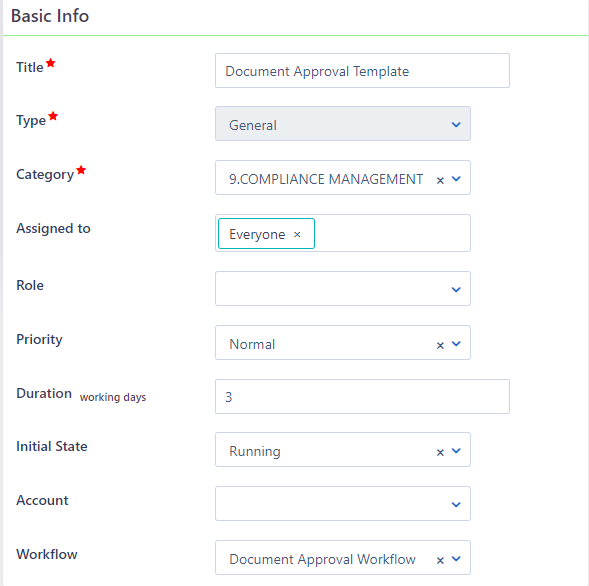
- Type: Select the type of Process you want to associate the Template with. This means that a Template of type “General” will be available when creating a new generic process, a Template of type “Project” will be available when creating a new project, etc.
- Category: Search for a Process Category and select it or add a new one. See how to add Categories in Data Management.
- Assigned to: Click on the Assigned to field in order to see Comidor Users and Groups. You can assign this Process (when created) to as many people or groups as you wish. This means that people you will select here, are those who should participate in this process. Also, choose the Role.
- Select the Priority (Low, Normal, High, Top) of the Process Template.
- Put the Duration in days or hours (depending on the expected process duration) – this will set the scheduled end date and time when taking into account the scheduled start date and time.
- Initial State refers to Opened, Confirmed, Scheduled, or Running state, that users can set for the beginning of the Process.
- Finally, each Process Template may have its core relations. So, you can Link this Process Template with an Account and a Workflow.
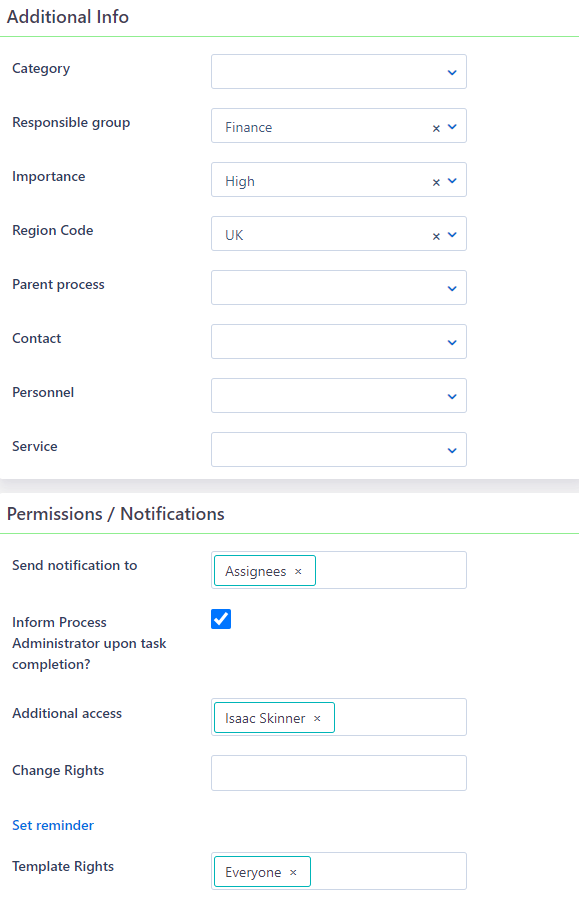
- In the Additional Info, fill in:
- Category: Extra categorization option.
- Responsible group: The group which probably has the accountability of this Process.
- Select Importance (Normal, High, Top).
- Link the process template with a Parent process, a Contact, a Personnel, or a service. Type some related letters to find an entity.
- From this point, you can choose who you want to have access to the Process Template and whom you wish to send notifications to:
- Send notification to: Fill in Comidor Users and Groups, you wish to receive a notification when someone commented on this Process.
- Additional access: People or/and Groups that should have access to this Process, without being necessary to act upon it.
- Change rights: People or/and Groups that could edit this Process details in the future. “Everyone” is chosen by default. This means that everyone who has access to this Topic will have the right to modify it.
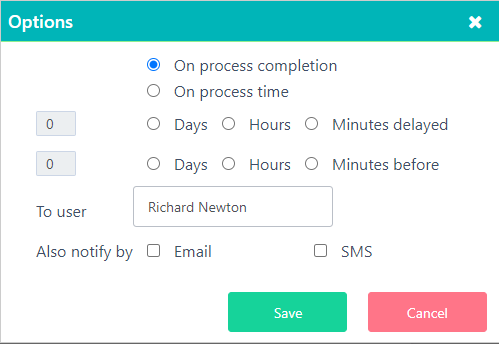
- Set reminder: Click on this button, and in the pop-up window, specify the reminder options you wish.
- Choose when to send the notification (On process Completion or On process time). Or select when the reminder should be triggered (Number of Days/Number of Hours/Number of Minutes delayed or before the process completion/process time)
- Select the user to whom the reminder will be sent
- Check the Email and/or SMS box if the user is to be notified via email and/or SMS
- Email reminders will be sent provided that the email account is connected to Comidor. SMS reminders will arrive provided the recipient user has set a Mobile phone in his Personal Profile – this is available upon request
-
- Template rights: People or/and Groups that could use this Template and of course have access to this.
- Template rights: People or/and Groups that could use this Template and of course have access to this.
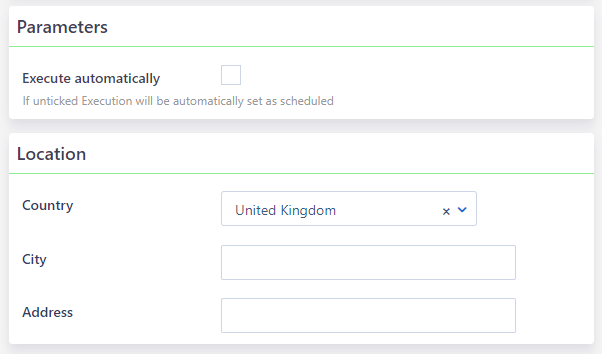
- Additionally, you can choose whether to Execute automatically the new process, when created. This will start and finish automatically the process in the specified timeframe.
- Add the Location details, such as Country, Address, City.
- Then, complete the Process Template Description.
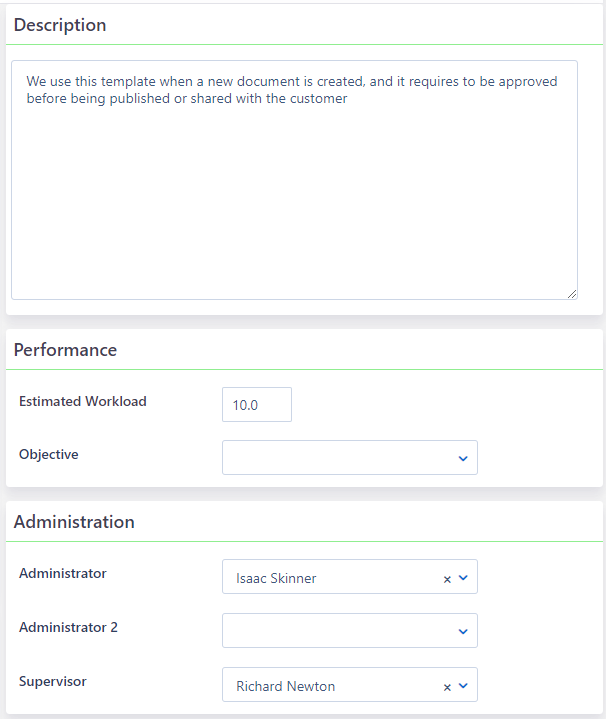
- In the Performance tab, users should put Workload in hours, which will be the sum of the duration of all tasks that should be performed upon this Process completion. From this point, you can link this Process Template with a KPI. Just type an Objective in the respective field.
- Then, set users that will be Administrators and Process Template’s Supervisor. Practically, this means that these users will have access to the created Process, even if they are not added in the Basic info above.
- Click on Save to save the Process Template, on Save and New to save this template and create a new one, on Save and notify when you need to save but also send a Note- Notification message to appropriate people, or Cancel to cancel the procedure.
View and Edit a Process Template
- Go to Packages Icon > Process Orchestration > Process Templates.
- Select a Template from the List view and click on it to access it.

- A new record preview will be displayed on the right side of the screen. You can move the bar with your cursor to resize your preview, click on the open in full view icon, or on the “x” button to close the preview.
- Click on Tags to add a new Tag on that Process Template that it may be private, group, internal or public. From this point, you can also manage old tags that have been added to that Template.
- Putting Tags may help you in grouping them, filtering, and finally find them easier.
- Add comments to this Process template, and the users that have access will be able to view them and respond.
- Click to Edit the Process Template by clicking on the pencil button on the top left.
- Make any modifications in the Process Template and then press Save to save the Process Template, on Save and notify when you need to save but also send a Note-Notification message to appropriate people with the changes you made, or Cancel to cancel the procedure.
- Click on the Actions button to Print this Process Template view.
Managing Process Templates
- Go to Packages Icon > Process Orchestration > Process Templates.
- Select Template(s) from the List view.
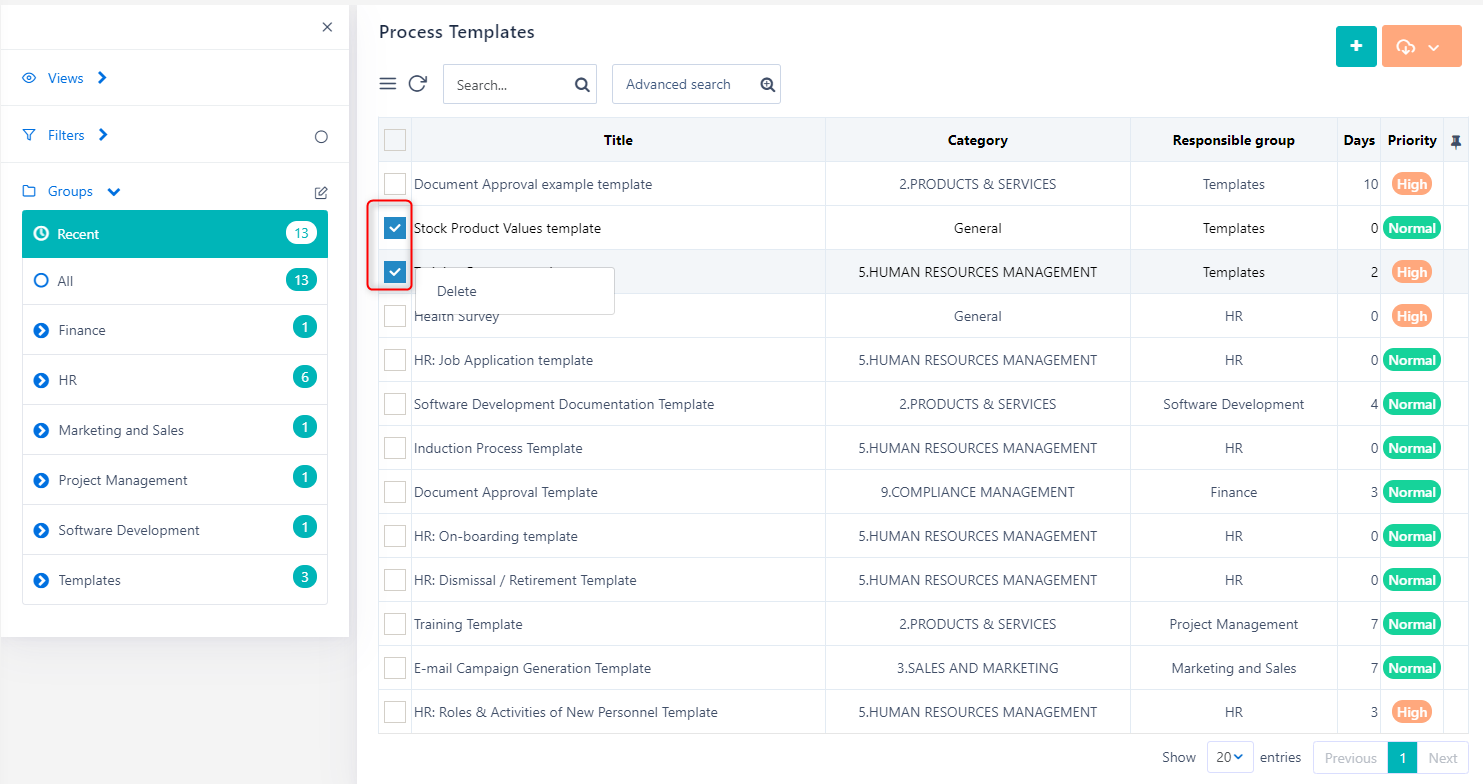 You can Delete the selected Process Template(s). A check message appears in a pop-up window prompting you to be specific and check which ones you would like to delete. Choose between “Yes” or “No”.
 - In the main view, click on the Actions button and select between Export or Print buttons in order to export or print the list of the Templates that you are viewing at that moment or all. Regarding printing, a new tab will open in your browser; please, make sure you will follow your browser’s printing procedure.

Make sure prior to any action that you are viewing the searched or filtered or all Process Templates after you have sorted and/or grouped them by the way you wish. Check Data Management options for more information about all these options below.
Create Form and Fields in a Process Template
- Go to Packages Icon > Process Orchestration > Process Templates.
- Enter a Template from the List view.
- Select from the left-side menu the tab User fields in order to create custom user fields for the creation form, when initiating the specific process template.
- Then, go to the tab User Forms and click on the “+” button to add the creation form.
- Complete the basic info as below.
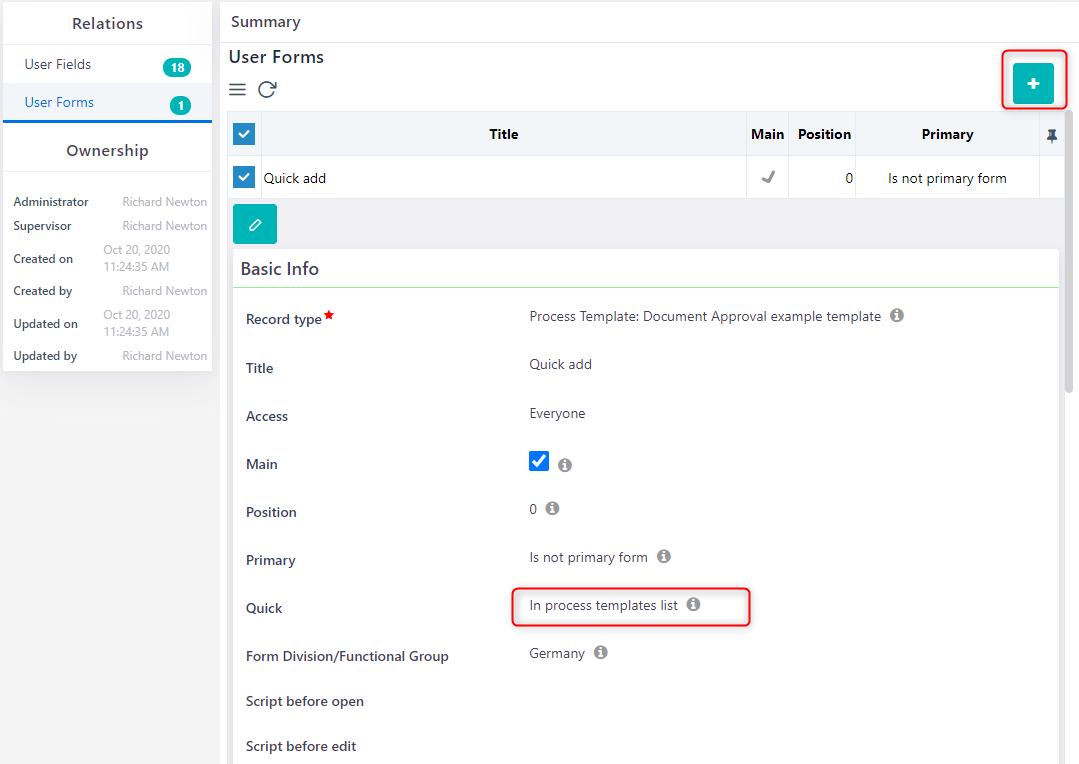
- Check Main, if you want to see this form and the data inside in your Mother Process. It will appear in a separate tab on the left side menu of the process.
- In the field Primary, choose to Replace existing form, if you wish this form to replace the Summary form of the process, retain if you wish to be displayed above Summary form in the Process, or Not a primary form.
- Do not forget to select in Quick the option In the process template list, if you wish to use this form as an insert form in the Quick Add. Alternatively, choose in a quick add menu and your form will appear in the quick add menu below other units.
- After saving the form, then scroll down to the form designer, where you can organize your form, add your fields, and make your form look the way you wish.
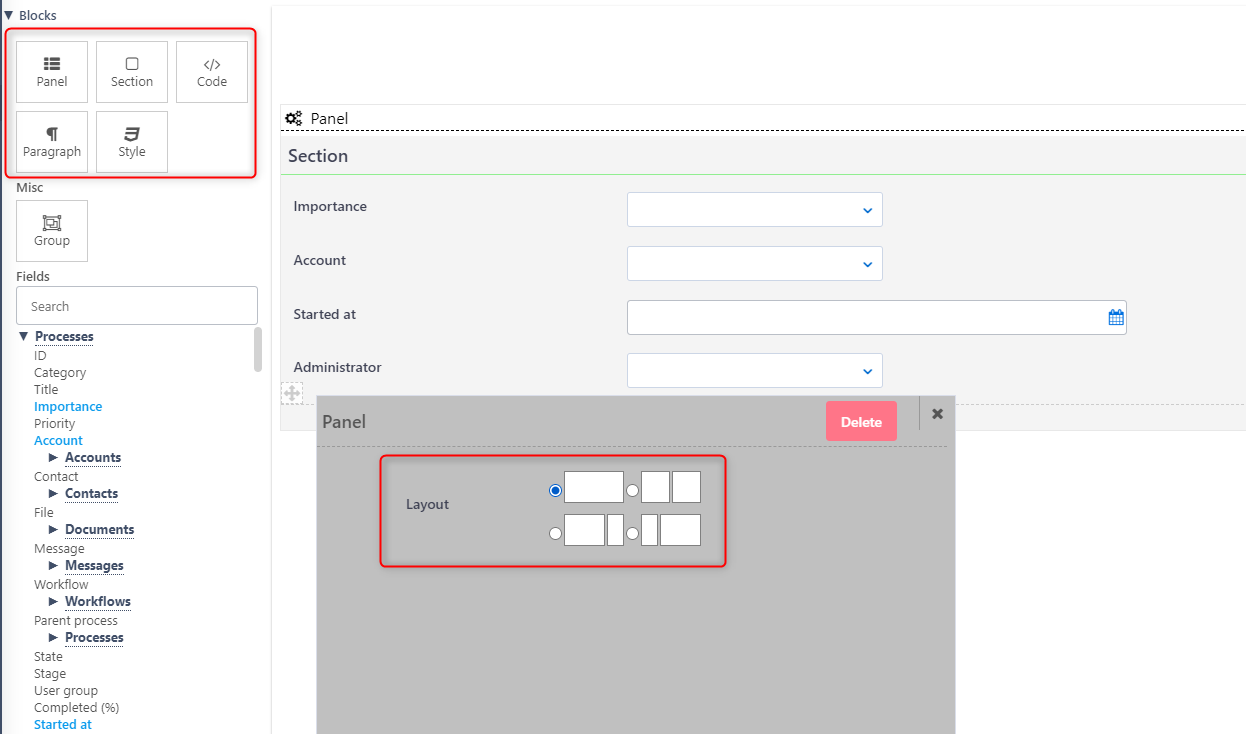
- Design your Form by inserting Panels, Sections, Paragraphs, Style, and/or code blocks. Simply drag-n-drop the block you wish on the page.
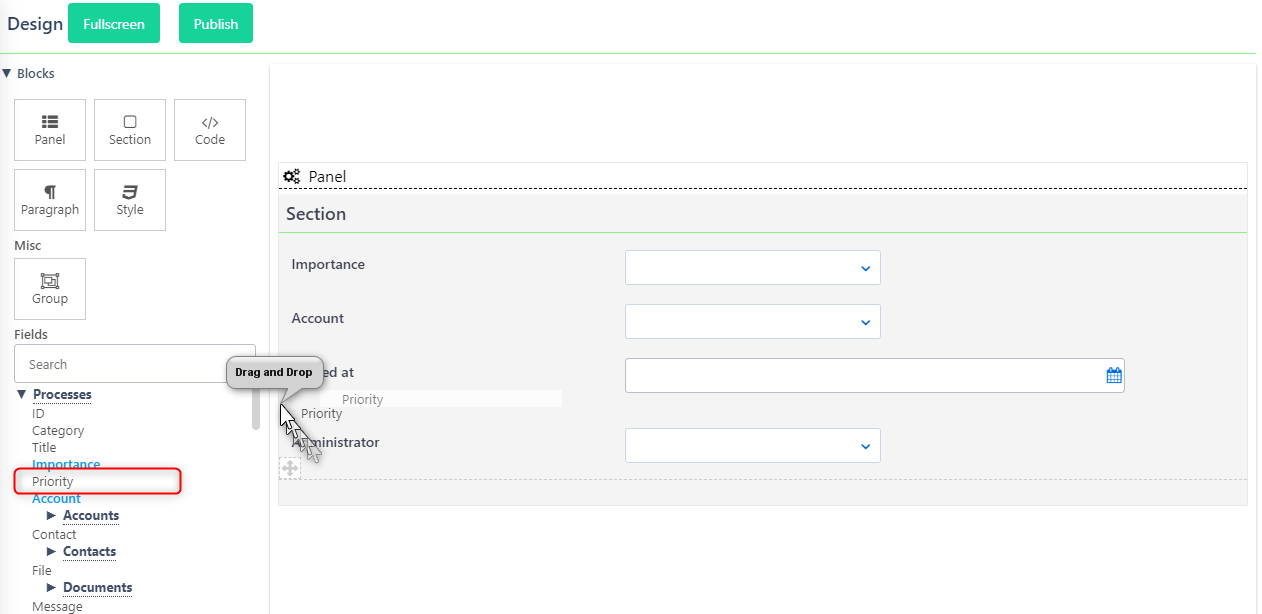
- In Sections, you can add as many fields as you wish with drag-n-drop functionality. You need at least one section to add your fields.
- In Paragraph, you can type your text, either in simple text or with the enriched HTML editor. Keep in mind, that you can add a value of a custom or database field that is being used in the process/app, as a variable in your paragraph.
- In Code, advanced users can add a Procedure.
- In Style, you can customize the font colors, font size of headers, labels, etc of your form.
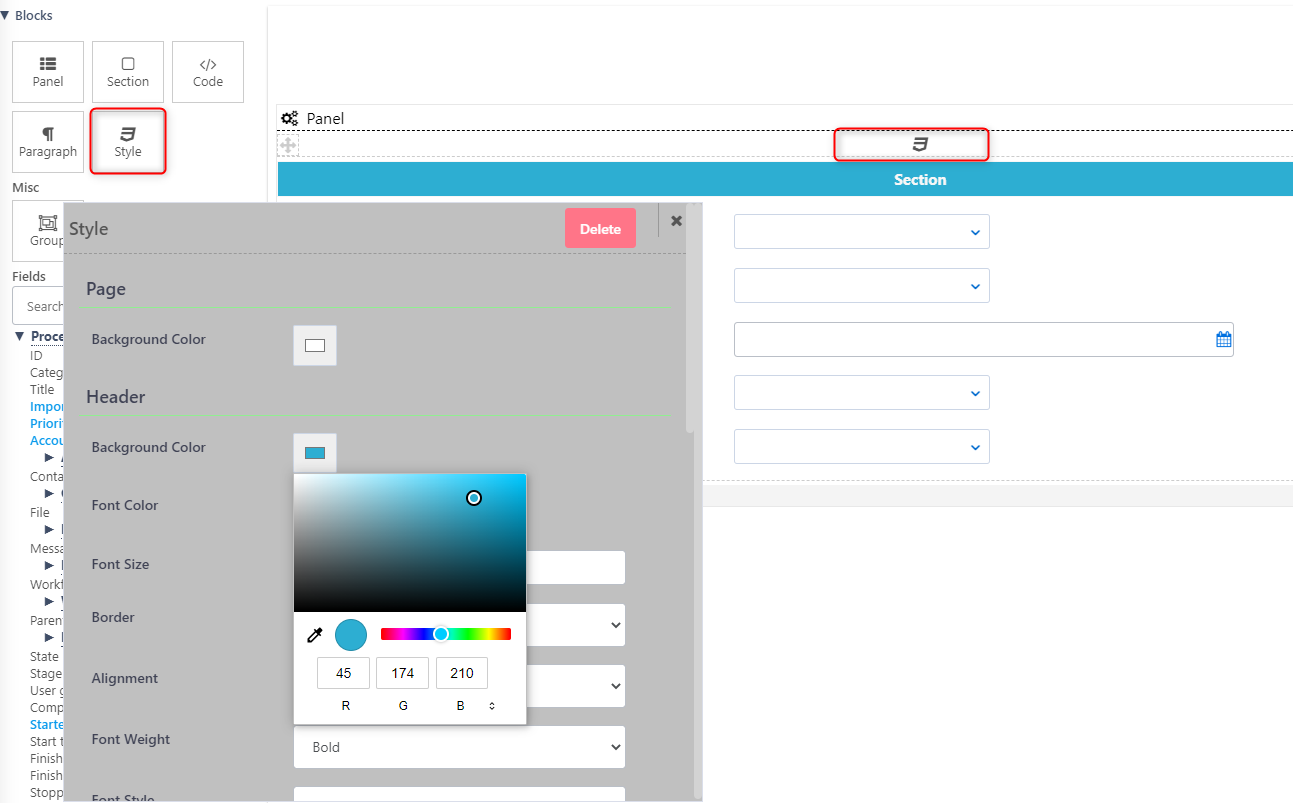
- Click on one of the blocks and in the window that opens you can edit, rename, or delete the block.
- Select the Page Layout of your preference
- Design your Form by inserting Panels, Sections, Paragraphs, Style, and/or code blocks. Simply drag-n-drop the block you wish on the page.
- Search database fields or/and custom fields from Available fields List and then and drag-n-drop them to Used fields list inside the Container you have created.
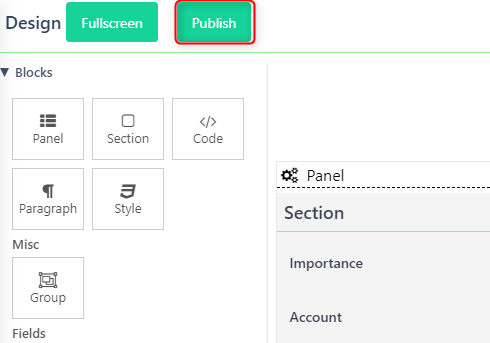
- After the design of the form is finished, you should press the Publish button in order to publish your form.
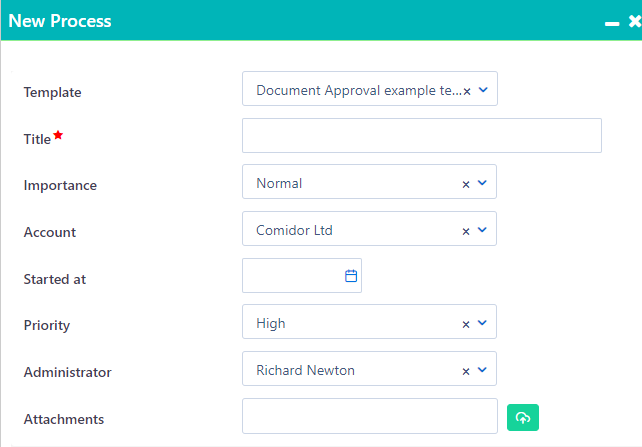
- Here, you can see how your form will appear in the Quick add menu after you select the Template you have made. The fields Title and Attachments by default appear in all Process Templates. You have the ability to choose from a numerous list of database fields or/and custom fields to be added to your form.
For more information on how to create user forms and fields please visit our User Fields and User Forms Help Center.