Comidor provides the ability to create and manage events where users can confirm their participation. Events are a different type of Process and repetitive Events can be automated with the use of Process Templates and Process Scheduling.
By confirming participation in an Event a new Task will be added to the Calendar.
Events are placed in the Calendar in a different color from the Tasks.
Create a new Event
- Go to Workplace > Events
- Click on the + Icon to create a new Event
- Complete the Basic info:
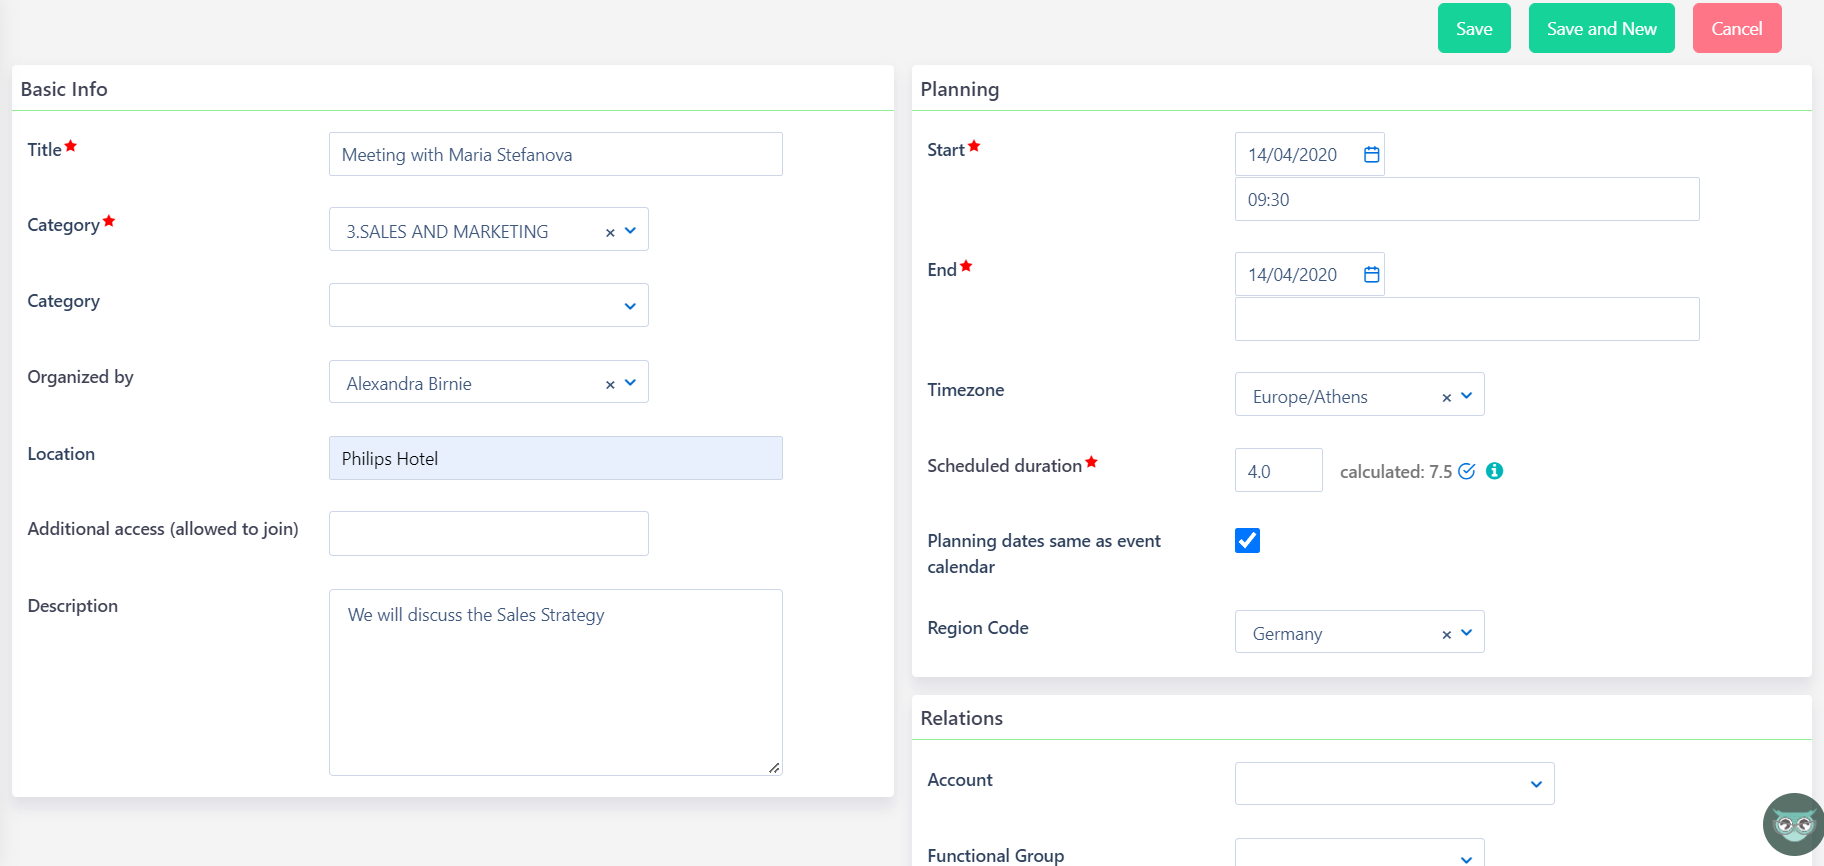
- Create a Title which will be recognized by the users participating in the event
- Select a Business category (this list comes from the Processes categories)
- Add a Location for your Event
- Add a small Description
- When creating the Event, the state of the Event will be as Confirmed by default. Users can change the state manually to Running, Completed, etc as the Event progresses
- Add Scheduled Start and end dates and times. Click on the Calendar to add the hours
- Connect the Event to an Account. Fill out the Functional Group, the Division and the location where the event will take place
- Select the desired Save option (refer to Quick Reference Guide)
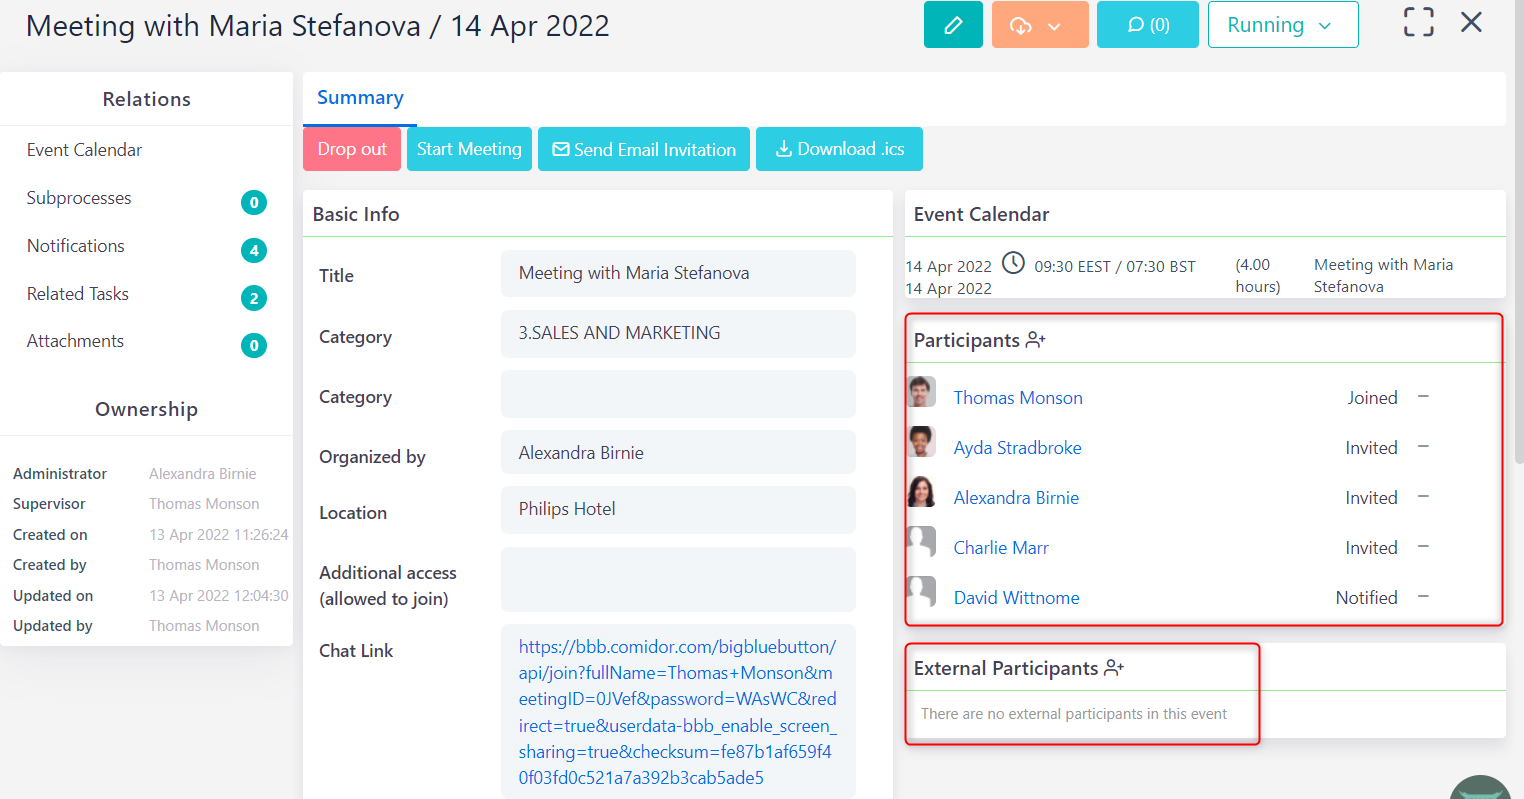
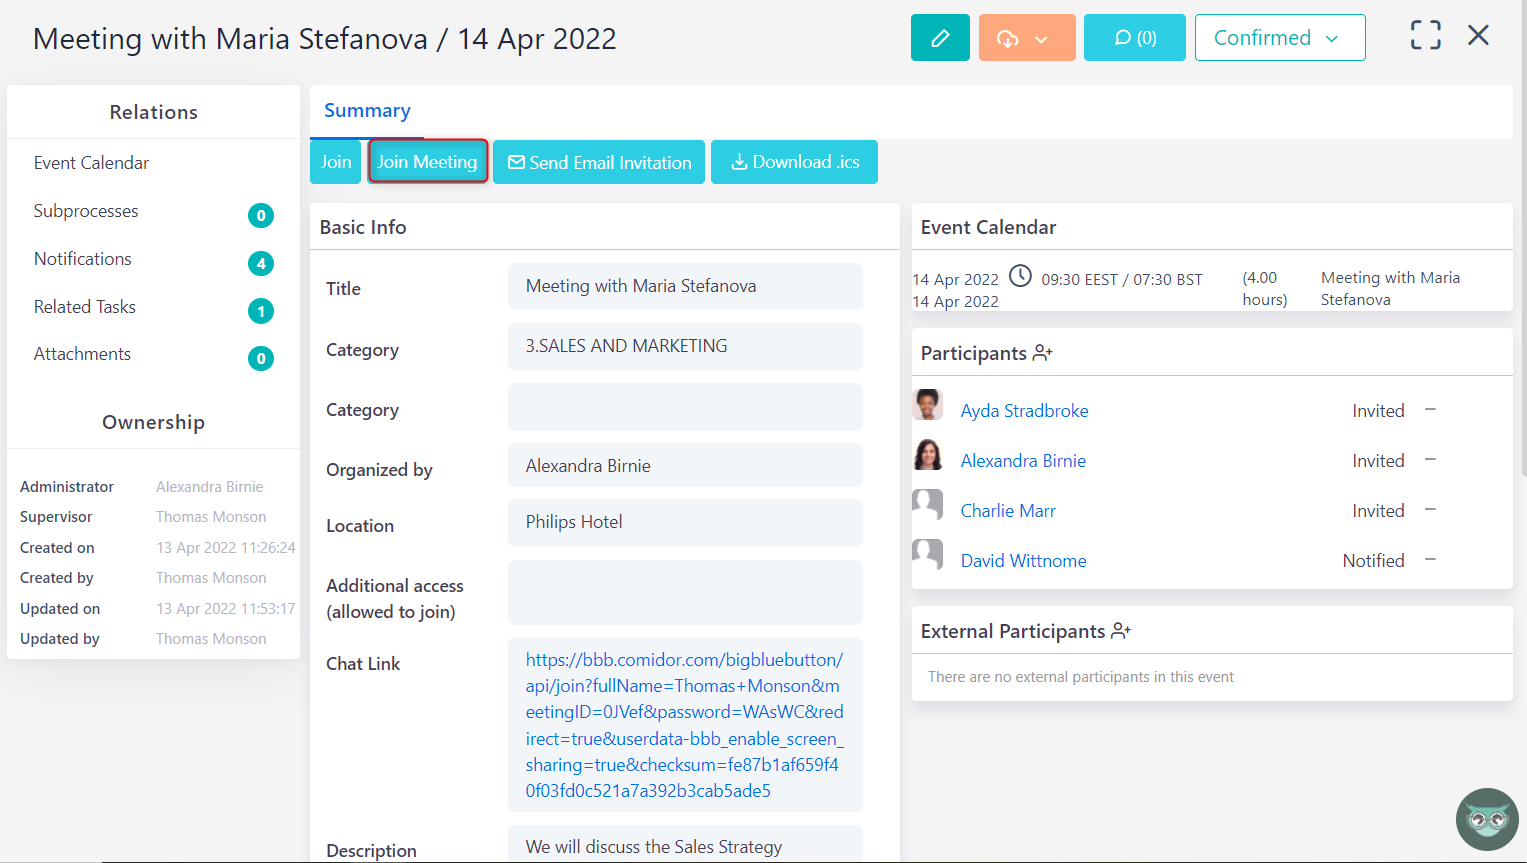
- Invite the Participants (Comidor users) and send them an email to add the event on their Calendar
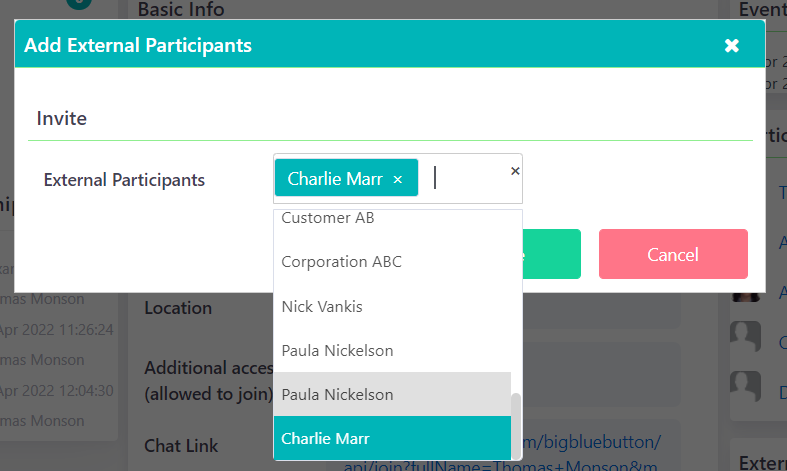
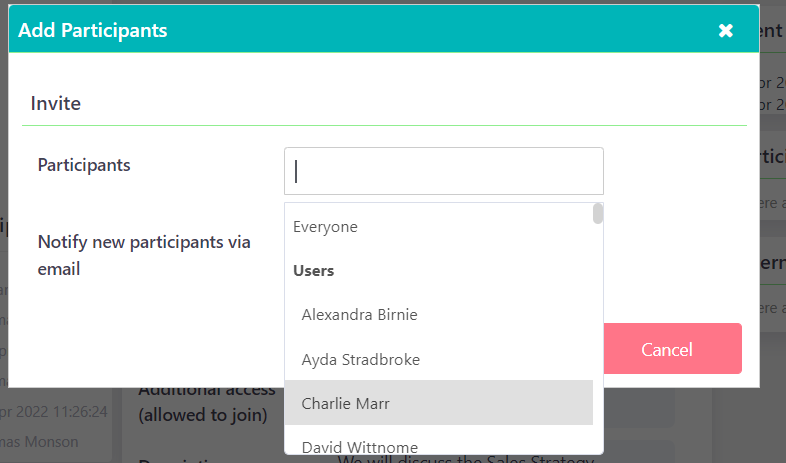 Apart from internal contacts (Comidor users), you can now include external contacts as participants in an event. Choose from the list the contacts to whom you wish to send the invitation. The invitation is sent to the external participant by email. You should previously insert the email in the form of contacts.
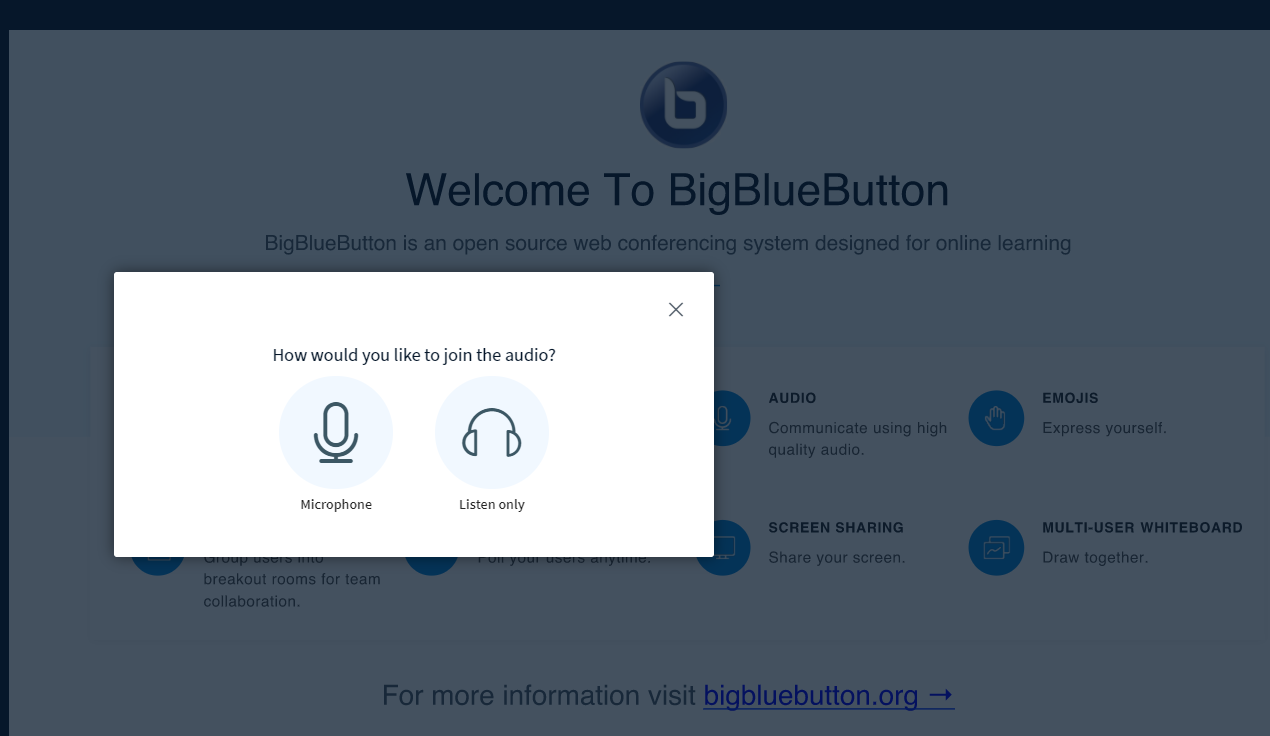
Big Blue Button option: Open Source web conferencing system designed for online learning
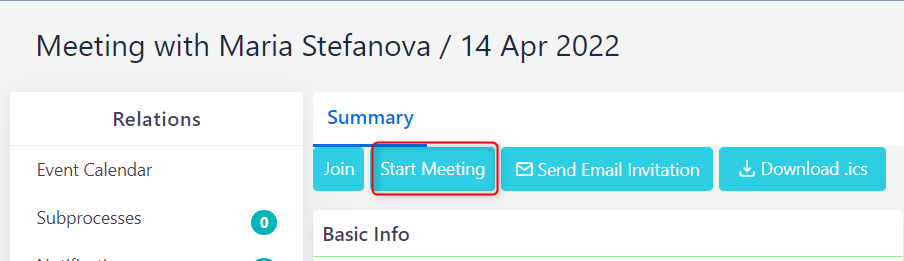
- Press Create Meeting Link to create the link for the meeting

2. Press Start or Join Meeting if you participate in this meeting and a new tab will pop up with your name
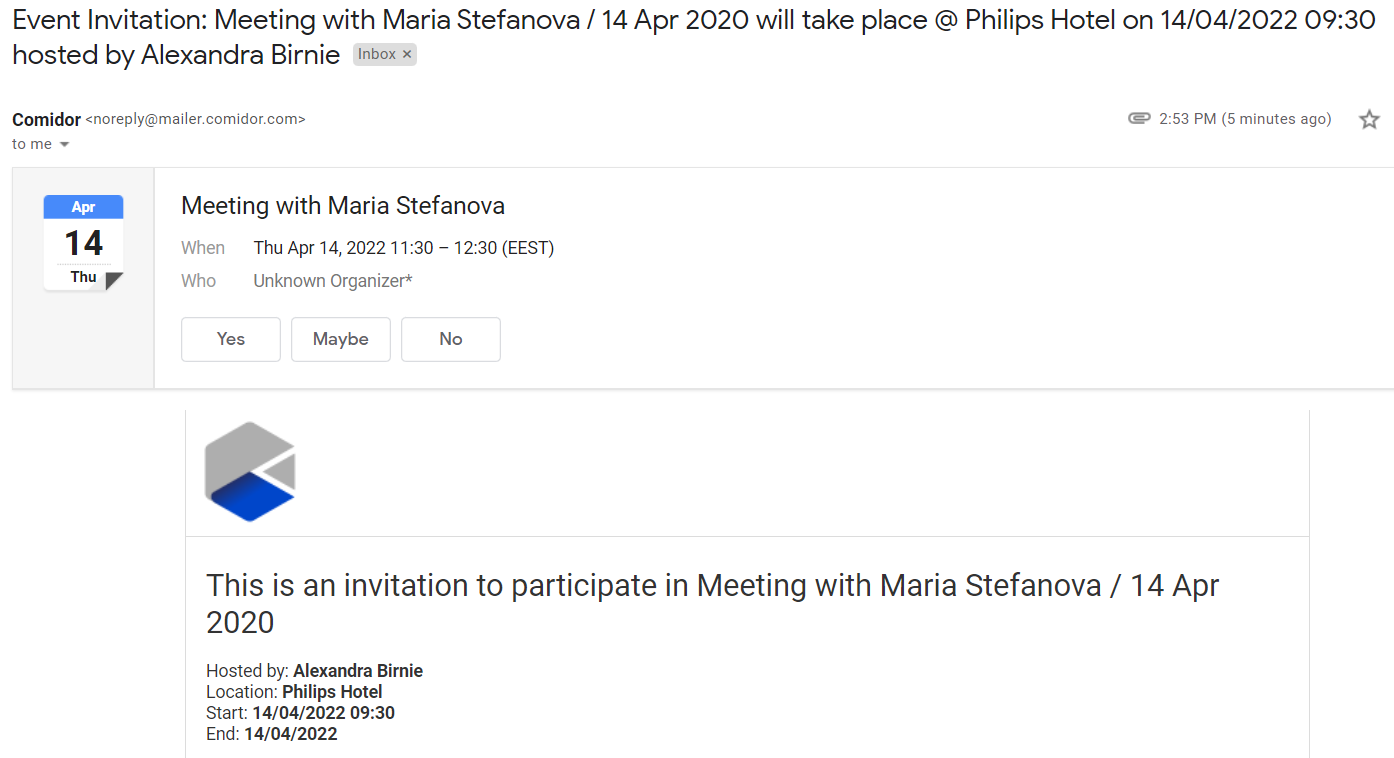
3. To invite non Comidor users, press Send Email Invitation and choose from the list of your contacts. An email will be sent to the contacts with information on the event and the link to join the event
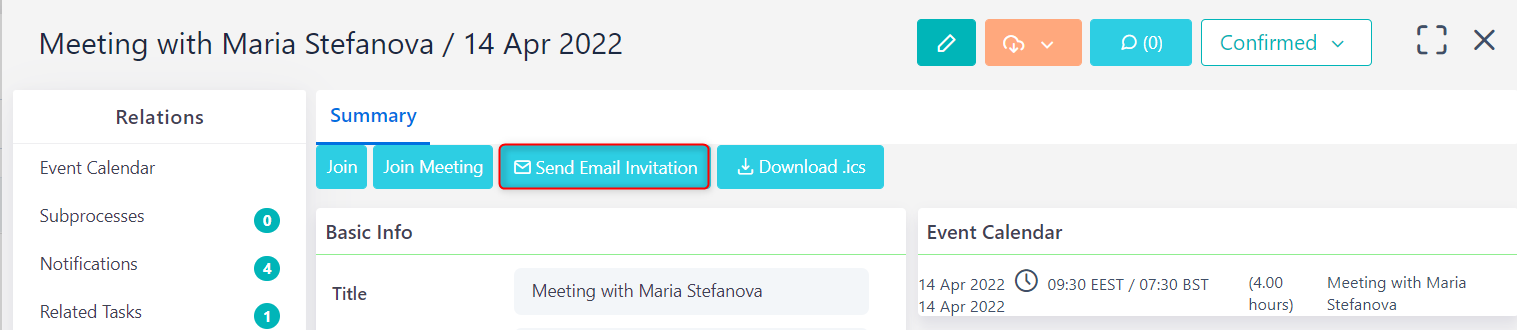
This is the email the non Comidor user will receive, with all the necessary information in order to join the meeting.
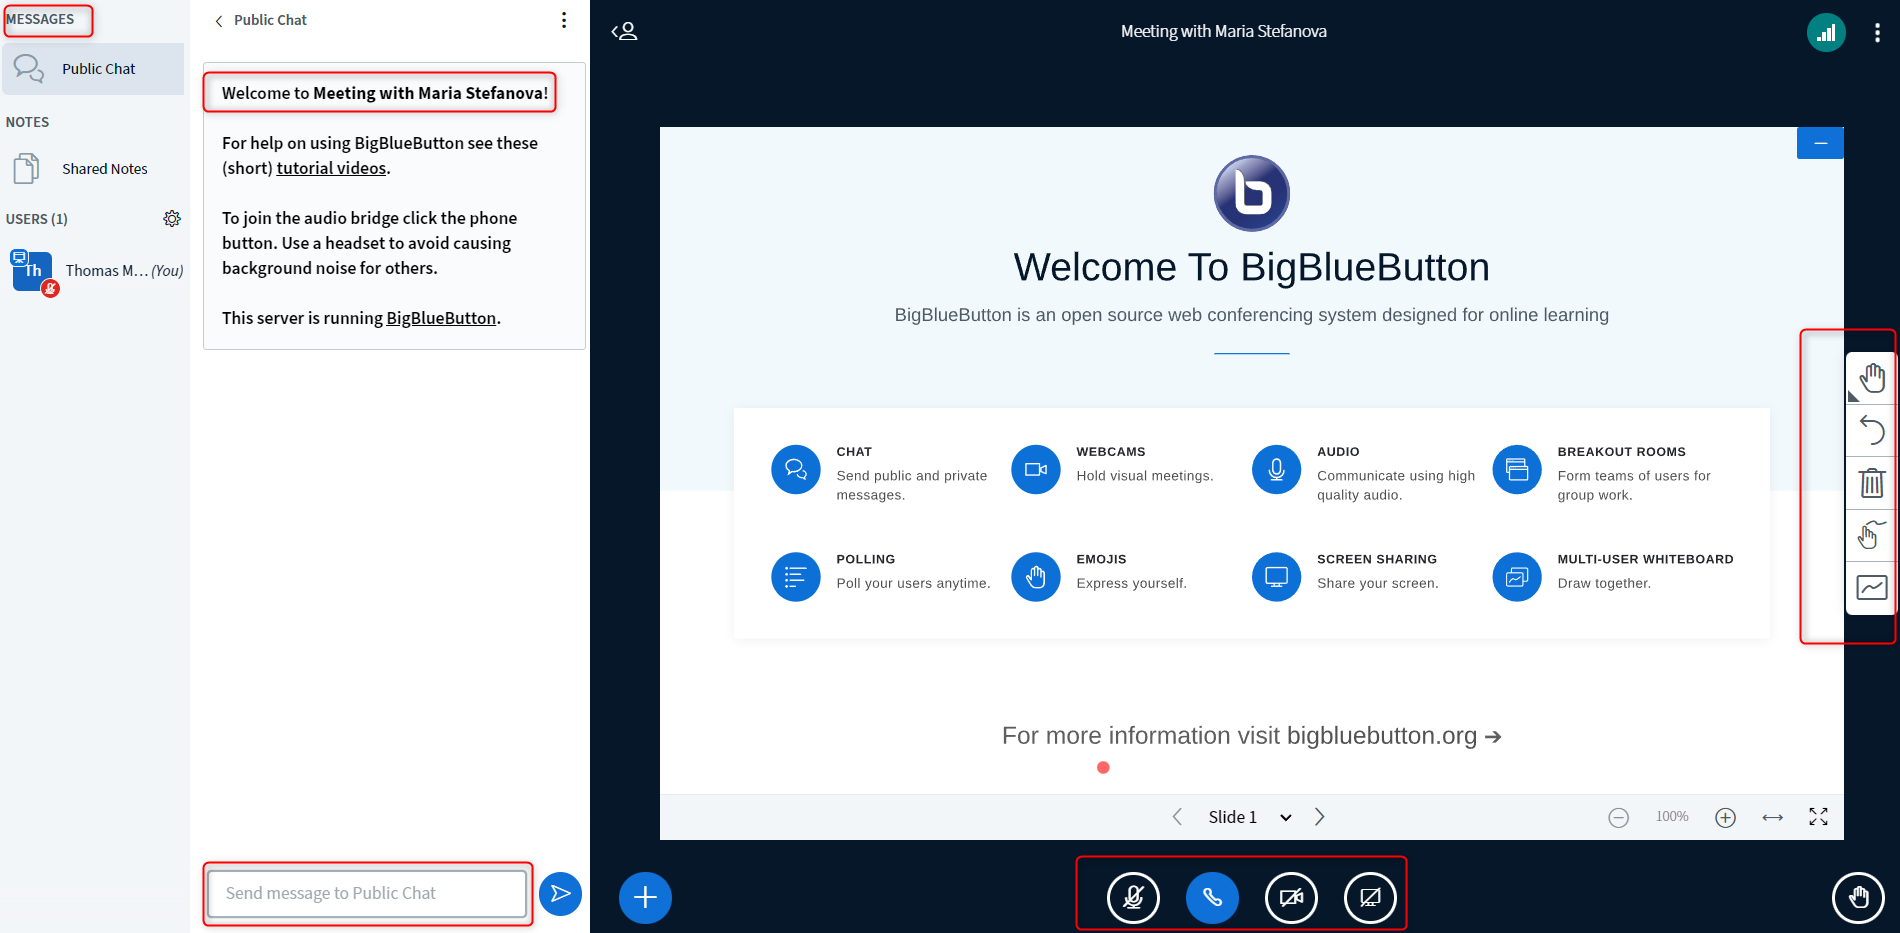
Pop – Up tab after starting/ joining the meeting
1. Select how you want to connect (Microphone/ Listen Only). Once you join, you can activate your camera as well.
On the left side, you can see the public chat, notes, and participants. The presenter can share his screen, a video link, or a presentation. There is the option of Whiteboard to write something down during the presentation. A polling option, and take over the “presenter” option are available, too.
Edit an Event
- Go to Workplace > Events
- Click on the Event to edit from the Event list
- Click on the Pencil Icon on the top right of the screen to edit the Event
- Make changes to the fields that were explained in the Create an Event section above. Select the desired Save option (refer to Quick Reference Guide)
View and Manage an Event
- Go to Workplace > Events
- From the list of Events click on the Event to view or manage
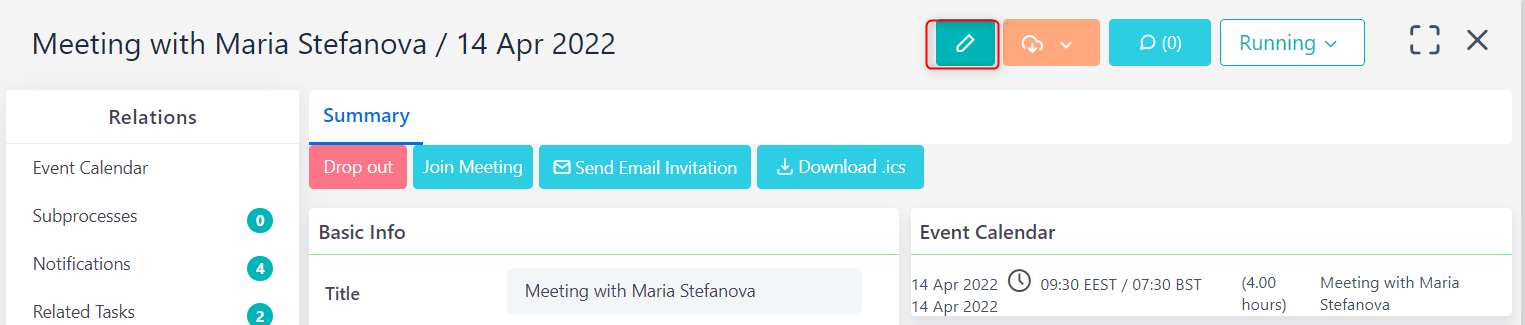
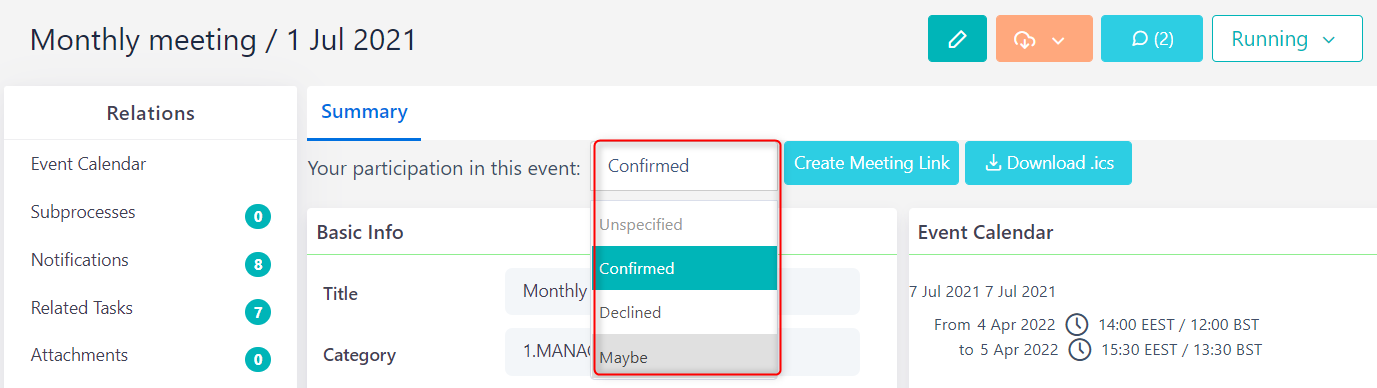
- This will bring up the Summary tab of the Event where you can view the Basic Info and Dates. On the right panel, all the users that were invited to participate in this event are displayed. Select to Confirm, set as Maybe, or Decline your participation
- On the top right part of the page, users can post Notes about this Event. Users that have the right to view the Event (the ones who are about to participate) can also read any Notes inside that Topic
- Add a Comment using a simple or enriched HTML Editor (Open editor)
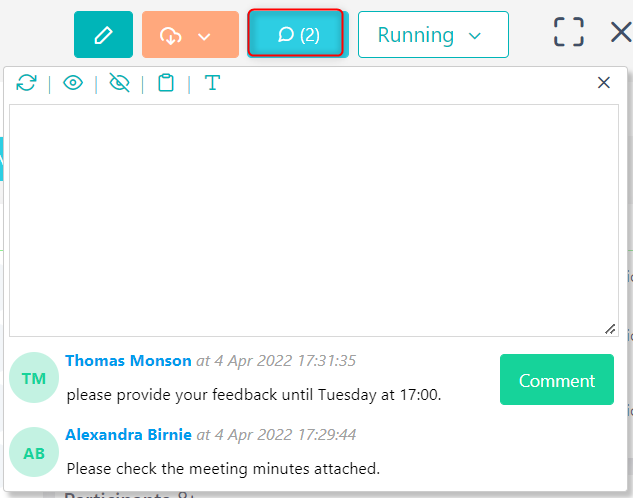
- Users can click on Refresh to see new comments; click on Show More or Show Less to expand or reduce the number of comments on view
- When a new comment is added users will receive notifications in the Notifications Bar about these comments
- Add a Comment using a simple or enriched HTML Editor (Open editor)
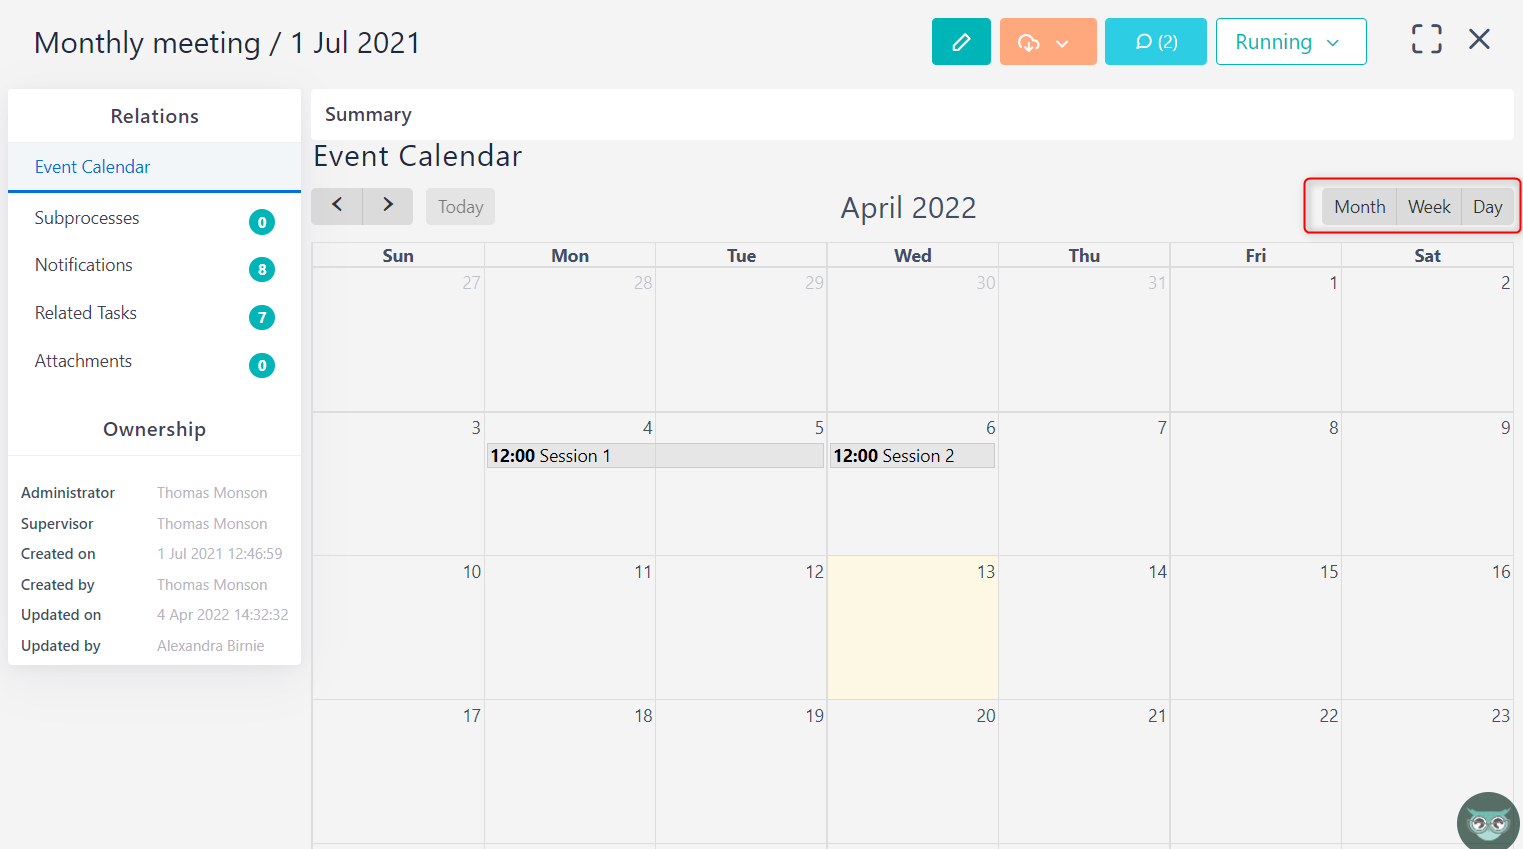
- From the Event-calendar users can monitor all the tasks related to this event. From the top right buttons, users can select to view them either by month, week, or day
- Users can easily create smaller processes for the Event in the Subprocess section
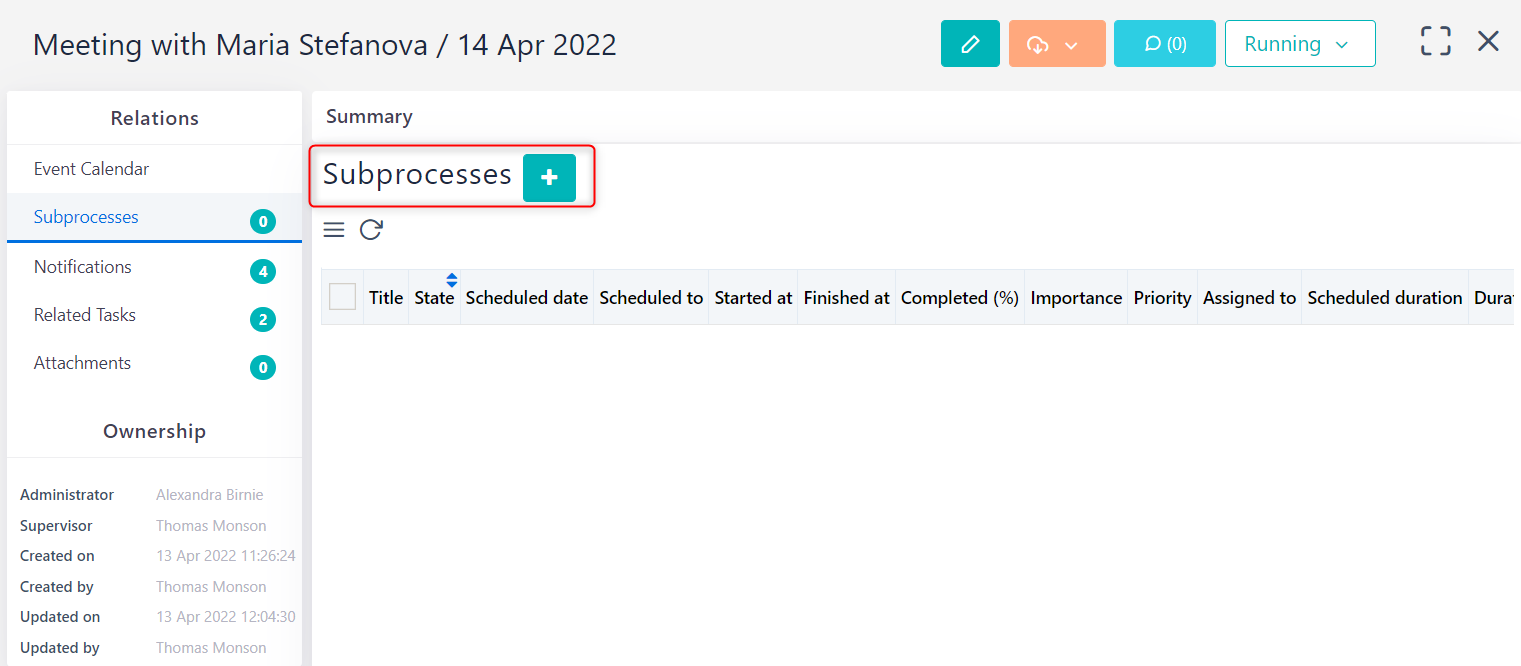
Just click on the + Icon button and fill the required fields in the pop-up window that appears.
The sub-process will need a title, start date, and end date. The Event the user is in is set as the Parent process by default and automatically links the subprocess to the Parent. The user can set the importance status, relate this sub-process to an Account, and attach a file to it
- Add Files that relate to this Event

- Click on Notifications to see all the Reminder – notifications regarding this specific Event. The notifications will refer to Event completion, Event start, Event delay or time before its start. View the notifications’ date and times sent and whether the Notification has been read and removed. The Notification can also be Deleted
- Click on Tags and Links to attach a Tag to this Event or link it with other Comidor entities such as Accounts, Contacts, Projects, Opportunities, Messages, Files, etc or select any other option from the Actions Icon on the top right
- Delete the event. A confirmation pop-up message appears
- Create a new Link in this Event. Link it with other Comidor entities such as Accounts, Contacts, Projects, Opportunities, Messages, Files, etc
- Create Notifications that will be sent together with a message to all the participants in the Event
Manage multiple Events
- Go to Workplace > Events
- From the list of Events select the Events to manage
- Choose between different actions
- Create a new Link in this Event(s). Link it with other Comidor entities such as Accounts, Contacts, Projects, Opportunities, Messages, Files, etc
- Delete the selected event(s). A confirmation pop-up message appears
- Export the selected Events to.ics. This means that you can sync the events with Microsoft Outlook