List Management helps administer data lists (Categories) which are used in other modules. All Comidor users can create public category Lists (i.e. Account categories). Users with system administration rights have the overall authority to view, correct, edit, or delete Lists.
Create a new List
- To add a new category or a new Type go to a Comidor List in any Comidor Unit and click to view the List content
- Click on Add to add a new category or type. Add a Category Name
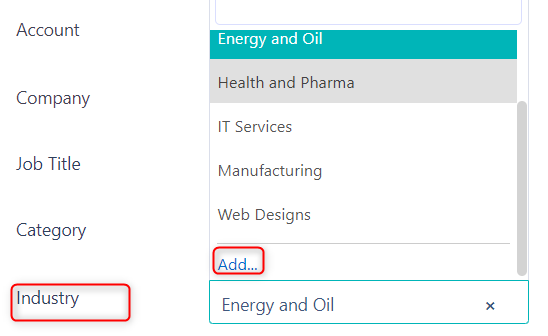
- To add the category as a core category click on Save. To add as a sub-category click to select the Parent Category or any sub-category (all categories are ordered in a tree-mode) then click Save
- Click on Add to add a new category or type. Add a Category Name

To add a new list/category from list management, click on:
- My Company > Data Management > Lists
- Click on the ‘+’ icon to create a new category
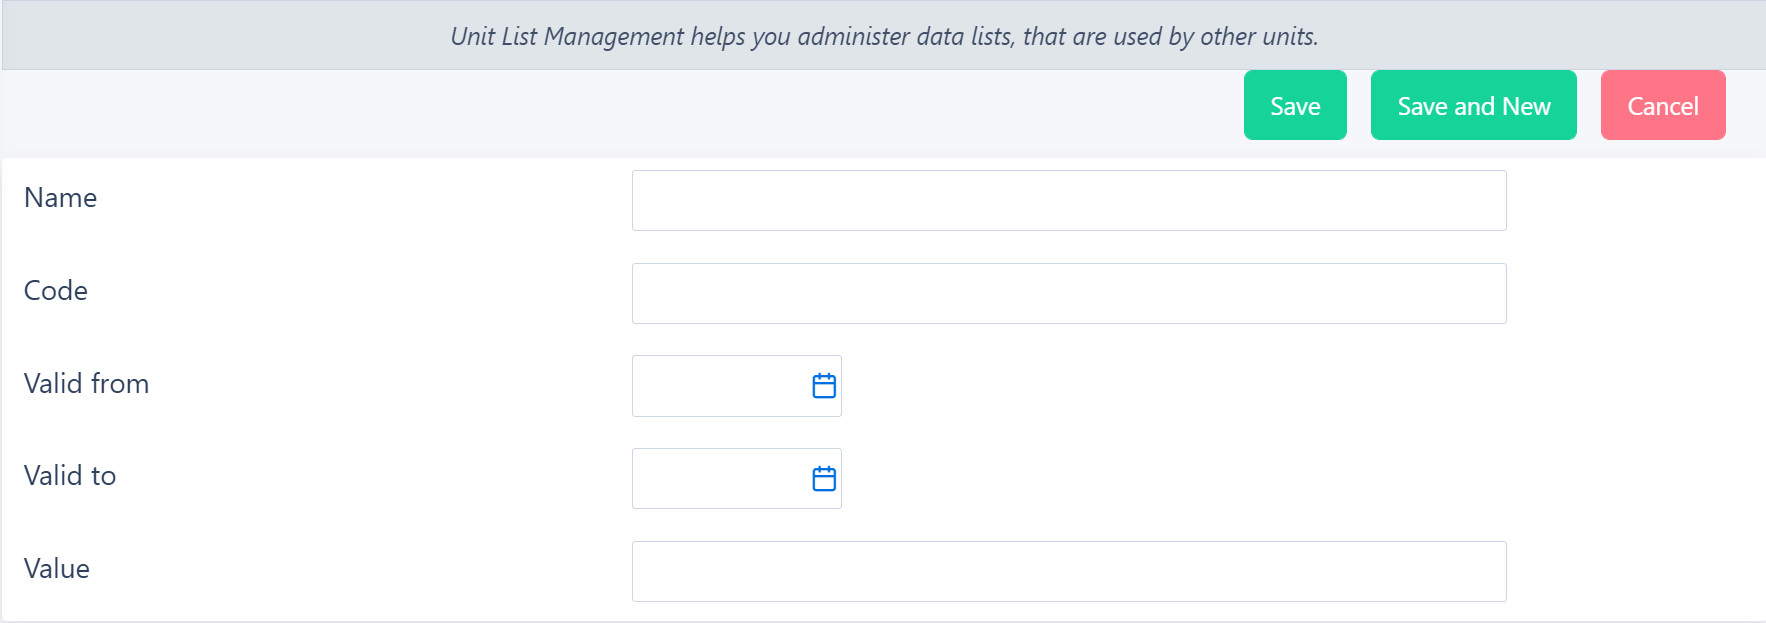
- Add a Name for the new list, a Code (which is the category path) and its Value
- Select the desired Save option (refer to Quick Reference Guide)
Edit and Manage a List
To edit or manage a list click on:
- My Company > Data Management > Lists
- Click on a list
- Click on the Pencil Icon to edit the List’s value
- Change the List’s value and click on save to proceed
- Click on the Actions Icon and select to delete the list. A confirmation pop-up box appears
Manage multiple Lists
To manage multiple lists click on:
- My Company > Data Management > Lists
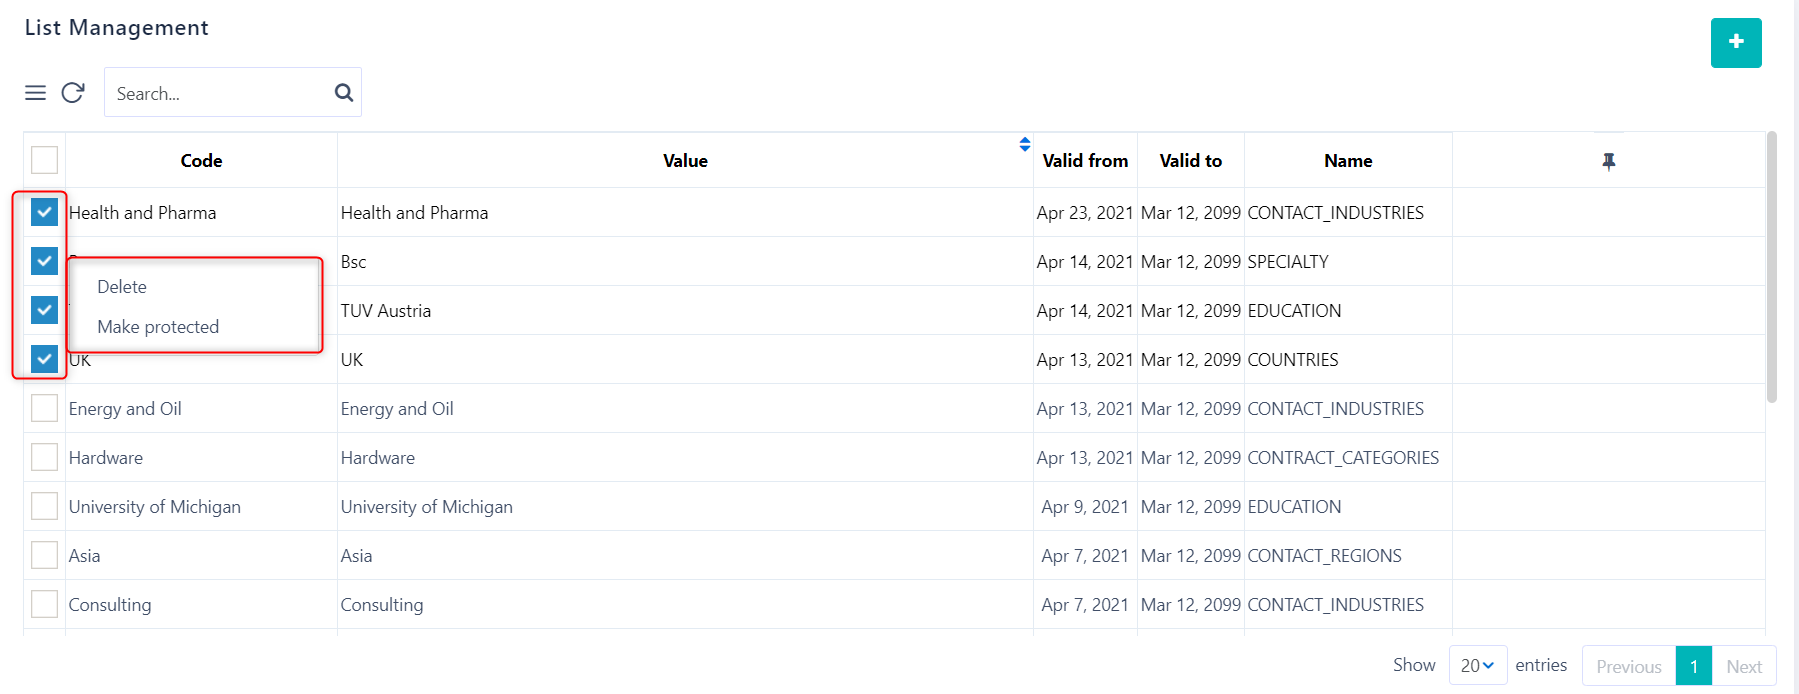
- Select multiple lists from the table to:
- Delete them (a confirmation pop-up box will appear)
- Mark as protected which will make these lists viewable only to internal Comidor users but not to Guest users (who have access only to public data)
Filters
Create a new Filter
- You can create a new filter by clicking on the advanced search icon which is available in every table in Comidor

- Fill in the filters with the required criteria and click on Execute to update the record list. You can use filters, fields, or operators (=,>,<, >=, <=, !=). Create a combination of conditions using the AND and OR criteria
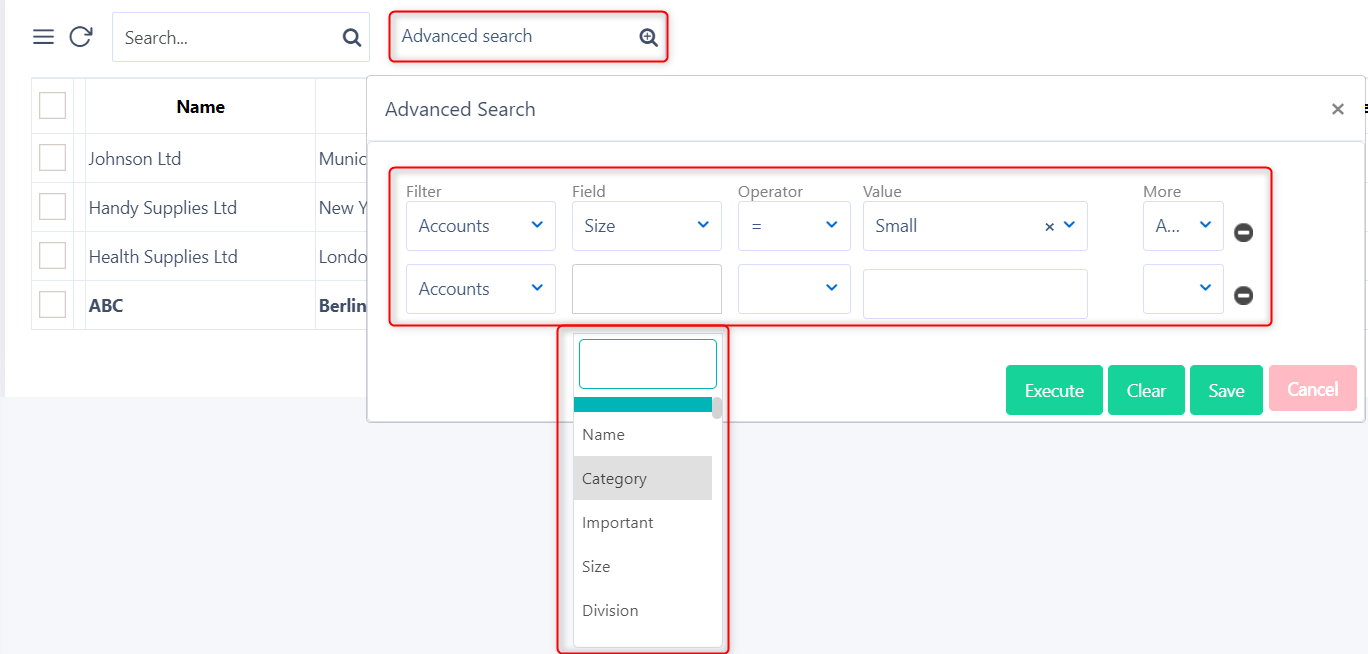
- Click on Clear or Save this filter to re-use it later. A new pop-up window appears. Type a filter name and keep this filter Private or make it Public so others can use it. Click Ok to proceed

- To load this filter you have to close and re-open the unit you are in and click on the custom filter drop-down list (called Advanced Search) to find and load a filter
Manage Filters
Filter Management is available only to System Administrators users.
Click on:
- My Company > Data Management > Filters
- In the left panel, you can see folders of the private filters (categorized by creator/owner name) and the public folders (indicated with no name). Clicking on each folder you can see the related filters
- Multi-check filters to:
- Make them public – everyone will be able to use them including guest users
- Delete them.
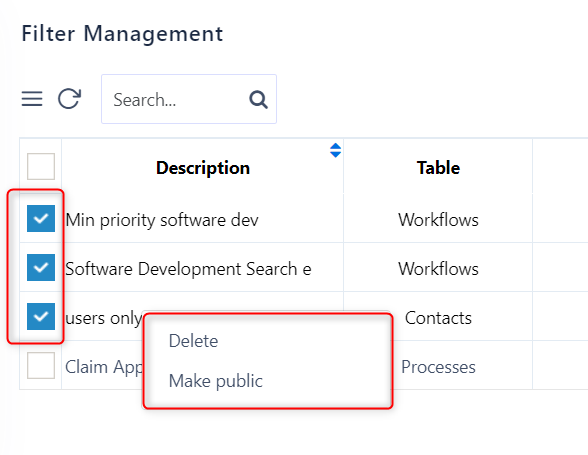
- After selecting a filter you can click on the Actions icon to delete it
- Click on the Actions Icon of the Filters table to Print or Export the list
Process Map
The process map helps manage business categories that are used in all types of processes in Comidor (Generic Processes, Opportunities, Projects, Work Packages, Tickets, Surveys, Campaigns, Events, Topics, Issues, Trainings).
Create a new Business Category
To add a new Business Category click on:
- Packages > Process Orchestration > All Processes, or:
- Process Orchestration > Issues
- People Management > Trainings
- People Management > Surveys
- Customer Relations > Opportunities / Campaigns / Tickets
- Project Management > Projects
- Daily Utilities > Topics or
- Daily Utilities > Events
- Click on the ‘+’ icon to start a new process
- Find the field named “Category” and click to expand the process map list
- Click on Add to add a new Category. Add the Business Function Name
- To add it as a core category click on Save. To add as a sub-category click to select the Parent Category or any sub-category (all categories are ordered in a tree-mode). Click on Save
To add a new Business Category from the Process Map click on:
- My Company > Business Architecture > Process Map
- Click on the ‘+’ icon to create a new business category
- Add a Name for the new business category, a Code (which is the business category path) and its value
- Select the desired Save option (refer to Quick Reference Guide)
Edit and Manage a Business Category
Click on:
- My Company > Business Architecture > Process Map
- Choose a specific business category from the list
- Click on the Pencil Icon to edit the business category
- Change the value of the business category and click on Save to proceed
- Click on the Actions Icon and select to delete the business category. A confirmation pop-up box appears
Manage multiple Business Categories
Click on:
- My Company > Business Architecture> Process Map
- Select multiple business categories from the table to delete them (a confirmation pop-up box will appear)


