Issues allow you to create entities that refer to a course of action that can be assigned and be brought to completion by multiple people, teams, and groups. People that have access to a specific process can notify each other upon any process change, monitor the issue, and check its stage. Issues can be matched with related Comidor objects (such as Files, Accounts, Contacts, Tasks, etc.) or be added as an entity that contains a problem, question, or suggestion that comes with e.g. a Project.
- Issues can be monitored through the Workbench and Process Dashboard.
- Repetitive issues can be created, re-used, and monitored from Process Scheduling.
- Easily create issues templates in Process Templates to re-use them quickly.
- Notify yourselves or your team of a specific action upon an issue with Notification Scenarios.
- Automate standardized Issues procedure with Workflows.
Create an Issue
In order to access Issues, go to Packages Icon > Process Orchestration > Issues. A new Unit Action Tab appears with the name Issues in the Active Units Bar.
Start with creating a new process by clicking on the ‘+’ sign in the Unit Title Bar. A new form appears.
- Fill in the Title of the Issue and the Basic Info of the Issue, as below:
- Category: Search for a Process Category and select it or add a new one. See how to add Categories in Data Management.
- Assigned to: Click on the Assigned to field in order to see Comidor Users and Groups. You can assign this Issue to as many people or groups as you wish. This means that the people you will select here, are those who will be responsible for this process completion.
- Select Priority (Low, Normal, High, Top) of the Issue.
- Then, you should set the scheduling of the Issue. Execution details will be filled in after the Issue starts.
- Moreover, you can Link this Issue with a related Account and a Workflow.
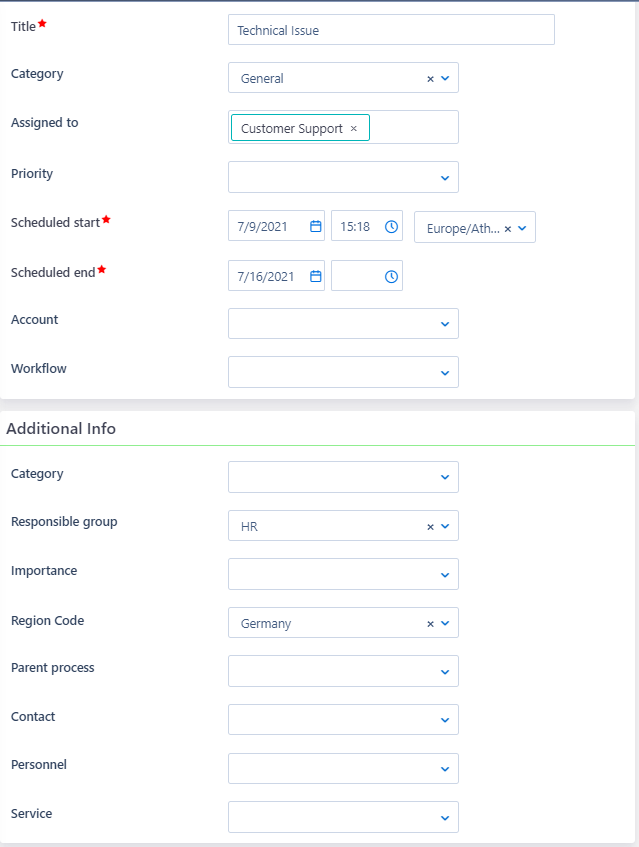
- In additional info, you have to complete the following fields:
- Category: Which is the 2nd categorization of Issues
- Responsible Group, which is the group from Organizational Chart, which owns accountability of the Process (Issue)
- Select Importance (Normal, High, Top)
- When Region code is set up in Regional Settings, suggested calculated hours give the timeframe of the working hours between scheduled start and end, excluding public holidays, etc.
- You can also link the issue with either a Parent process, a Contact, personnel, or a Service
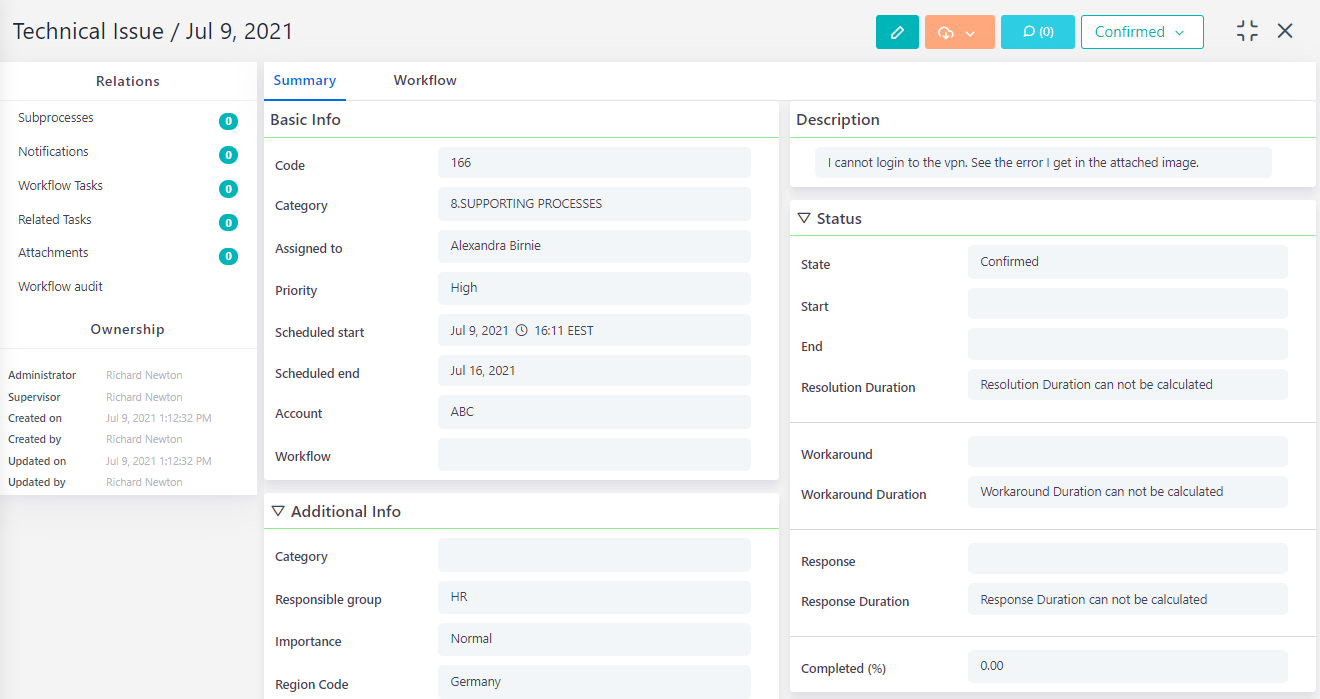
- Set users that will be Administrators and Issue’s Supervisor. Practically, this means that these users will have access to this Issue, even if you have not added them in the Basic Info above.
- Send notification to: Fill in Comidor Users and Groups, you wish to receive a notification when someone commented on this Issue.
- Additional access: People or/and Groups that should have access to this Issue, without being necessary to act upon it.
- Change rights: People or/and Groups that could edit this Issue details in the future. “Everyone” is set by default. This means that everyone who has access to this Issue will have the right to modify it.
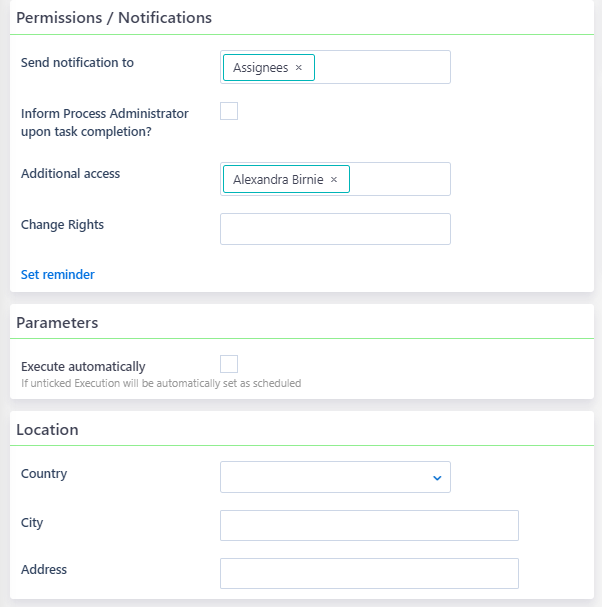
- You may want to add Location Details, such as Country, Address, and City information.
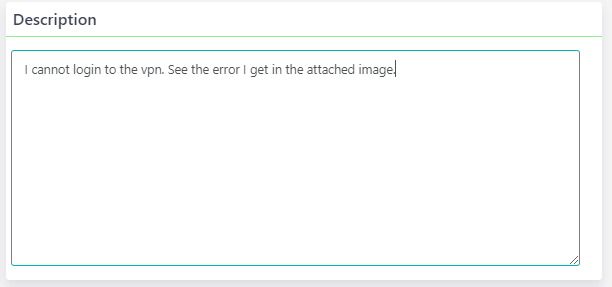
- Complete an Issue Description, in order to give further details to people who will work on its resolution.
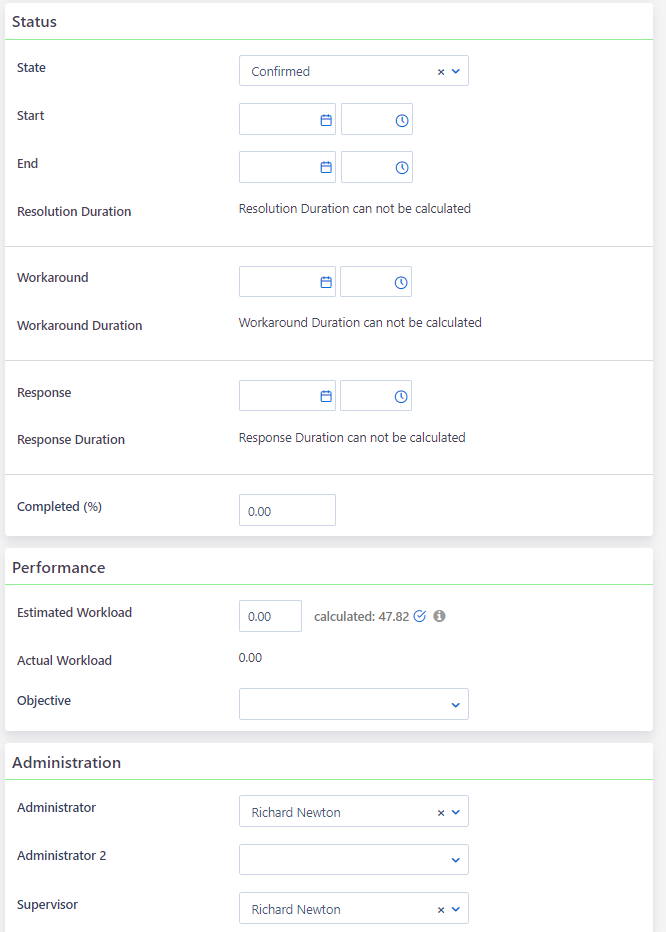
- The status field will be later filled when the process starts. In case, that the Issue has already started, make sure you will complete these fields as well.
- The state will be set automatically as Created when the Issue will be created. You may change this later as Confirmed, Scheduled, Running, Completed, Canceled, Paused, or Failed. Issue State will alter to Running and Completed automatically on the scheduled start and end dates and times, respectively, provided that you had check Execute automatically field above.
- Start and End Dates & Times are the execution actual start and end dates and times. You will see them when the Issue starts and finishes.
- Completed (%) is the percentage of Issue completion and should be added and managed manually by the Issue.
- The estimated workload, is the actual Issue duration, in hours. Calculated hours will appear only if the Region Code field with Regional Settings is selected. In the Process view, the Actual Workload will be calculated based on the Tasks’ duration sum. In terms of each Process Performance measurement, you may connect a KPI (Objective) with this specific Process (Issue).
- Finally, click on Save to save the Issue, on Save and New to save this and start creating another one, on Save and notify when you need to save but also send a Notification message to appropriate people or cancel to cancel the procedure. Create from template option is available when you have already added an Issue in Process Templates Unit in Automation-this will help you have ready-to-start Issues with specified people participating in them.
Edit and Monitor an Issue
In order to access Issues, go to:
- Packages Icon > Process Orchestration > Issues.
- A new Unit Action Tab appears with the name Issues in the Active Units Bar.
- As a result, users can edit and monitor it through Process Dashboard and Workbench units, too.
- Click on an Issue from the list view in order to enter and manage it.
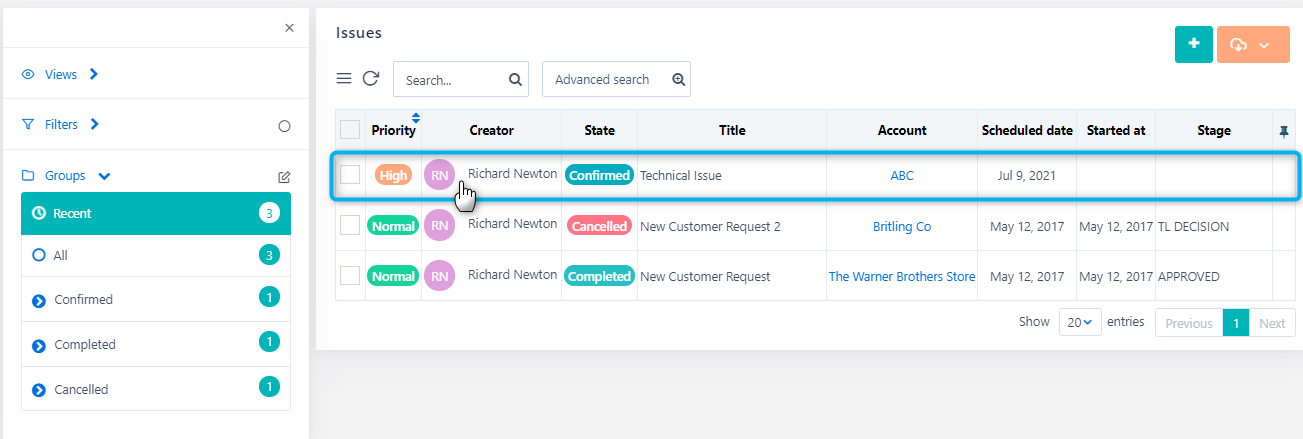
A new Unit Action Tab appears with the name of the Issue in the Active Units Bar.
- Click on the pencil button to edit the Issue details.
Edit button only appears to people who have been added in the Change Rights field of an Issue.
Apply any change, as explained above in Create an Issue above and click on Save or Save and Notify depending on whether you would like simply to save or send a Notification message as well while applying changes.
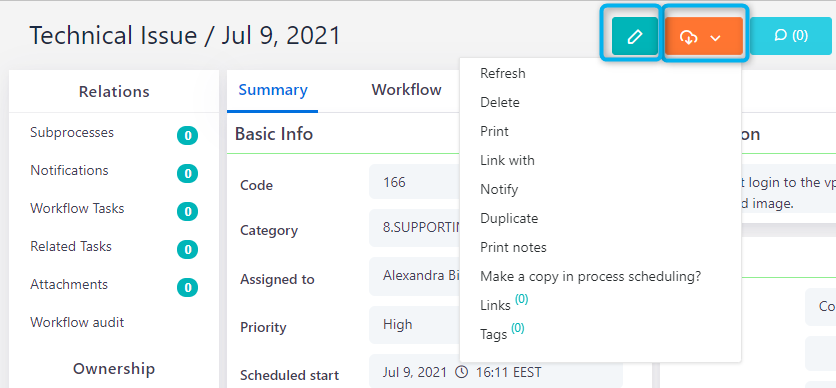
- Then, click on the Actions button to open a list of actions.
-
- The refresh button gives an instantly updated view of this Issue.
- Select Delete to delete this Issue. A check pop-up window appears.
- Click on Print whether you need to print this Issue view. A new tab opens in the web browser. Click on Ctrl+P to Print. (Changes may apply in different browsers)
- Click on Link with in order to Link this Issue with any Comidor entity (another process, account, contact, project, opportunity, etc.). A pop-up window appears.
- Click on Notify in order to Notify a person or group of people regarding this issue. Watch out to Notify someone that has access to this Issue.
- Also, you can create a Duplicate Issue based on this one.
- Print notes added on the discussion board of this Issue. Pop-up appears prompting you to select a timeframe of notes to report you are about to see/print.
- Make a copy in process Scheduling will copies this Issue in Process Scheduling unit, in the order you to be able to re-schedule it for the near future with repetition or not.
- Change the Issue state simply by clicking on the state button on the top right. Then select the state of the Issue.
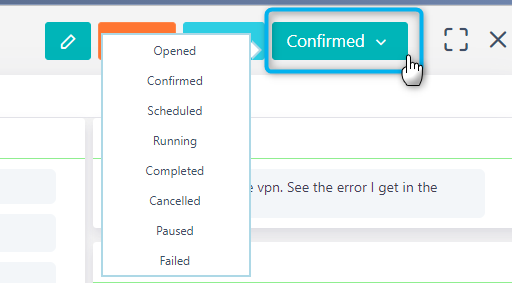
- Select either Confirmed or Scheduled in order to verify and schedule respectively the Issue that is about to start. A new pop-up window appears, where you can now set a different start time and date or take as granted the suggested time and date. Click on Save. Select Running and a new window appears, where the user can set the execution time, and then, the Issue state will change.
- Select Paused in order to pause an Issue for some time. A new pop-up window appears and the user can see the update in execution information.
- Click on Failed, when a user has failed to complete an issue, update start and end dates and times, duration (suggestion of tracked or computed duration are available), and quantity, and click on Save. See the update in Issue execution information.
- Click on Canceled on an Issue that you have canceled, update start and end dates and times, % of completion, duration (suggestion of tracked or computed duration are available), and quantity, and click on Save. See the update in Issue execution information.
- Click on Completed to set an Issue as complete. Update start and end dates and times, duration (suggestion of tracked or computed duration are available), and quantity and click on Save. See the update in Issue execution information.
- If the Issue is driven based on a specific Workflow, then under workflow tasks, you can monitor in which stage of the process the issue is currently on and which stages are the next ones. Make sure, you have selected the workflow when creating a particular issue.

- Click on Subprocesses at the side-box, in order to see all the processes that are included in the main issue. You can easily create a new sub-process, by clicking on the ‘+’ button. A new window appears and you have to fill in all the required fields. Click Save to proceed, or Cancel to discard the changes you have made.
- Click on Notifications at the side-box to see all the sent Reminder – notifications regarding this specific Issue. The notifications may refer to Issue completion, Issue start, Issue delay, or time before its start. You can see these notifications’ dates and times sent, whether you have read and removed them, too.
- If you have linked a workflow to this specific Topic, you can get real-time information regarding the Workflow Tasks that have been created and/or completed so far and the workflow run diagram in the respective tab. Also, you can monitor all actions that have taken place in the Workflow audit tab. Important information you can get at this point is:
- The server that calls the action
- Object Name
- Previous Stage
- Path Description and Condition
- Change Info
- Created and Modified by whom
- Creation and Update dates
- Last, you can click on Tags and Links in order to give a Tag on this Issue and Link it with other Comidor entities such as Accounts, Contacts, Projects, Opportunities, Messages, Files, etc.
Add Tasks & Files in an Issue
Task setting is necessary to schedule work that should be performed by multiple people and groups. Add a quick Task by clicking on the Related Tasks tab in the Forms Menu and then at ‘+’. The ‘+’ is visible only when the Issue is Running.
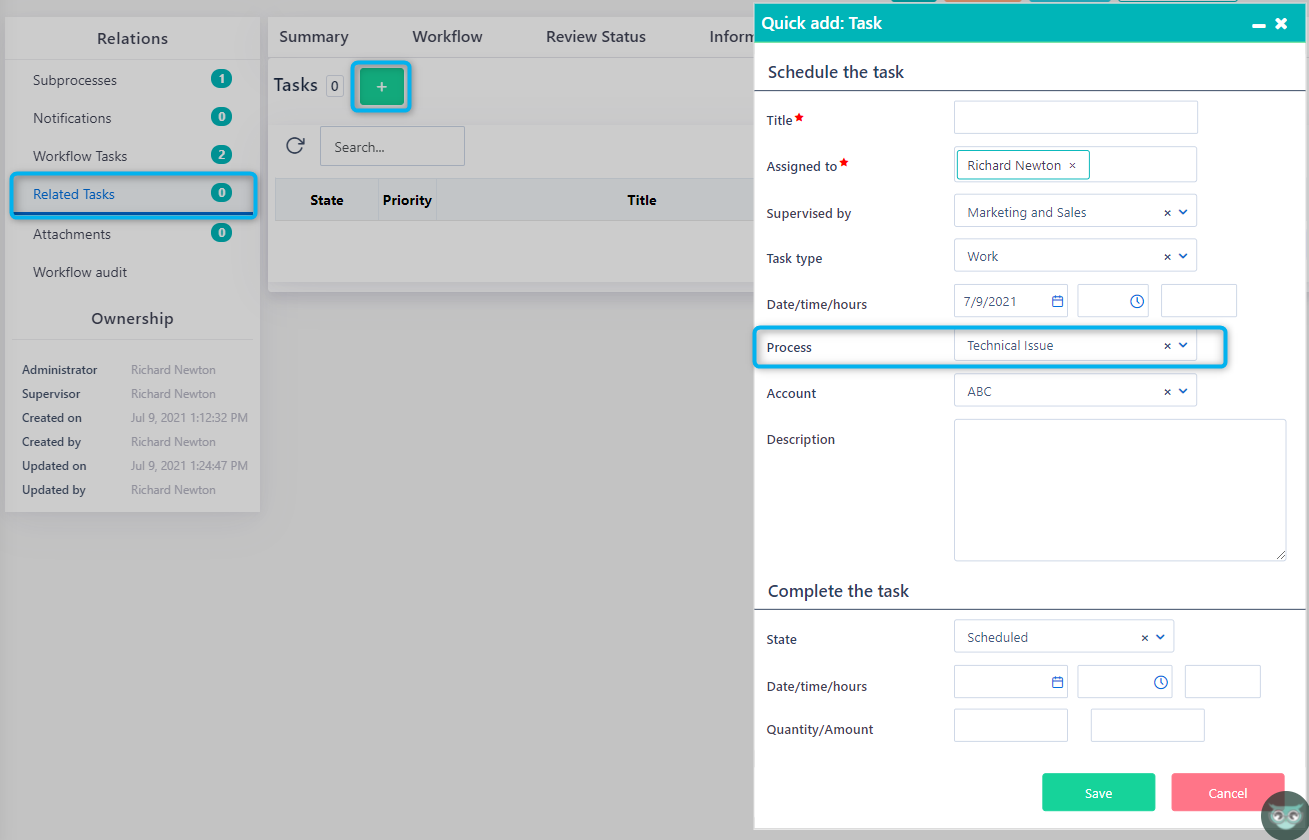
A new form opens. At this point, you can create multiple Tasks, enter and monitor them from this point. Click on the refresh button, in order to instantly see all new-added tasks in the form.

Also, you can easily upload related files straight from your Desktop or by clicking on to attach a File URL. Click on an already uploaded file to Open it (downloading and previewing of current and previous versions are available), Rename it, or Delete it.
Discuss below an Issue
Users that have the right to view an Issue (Users and Users in Groups that are selected in the fields of Issue: Assigned to, Supervised by, Additional access, Administrator, Administrator 2, and Supervisor) can also read any discussion that occurs inside that Issue in Notes.
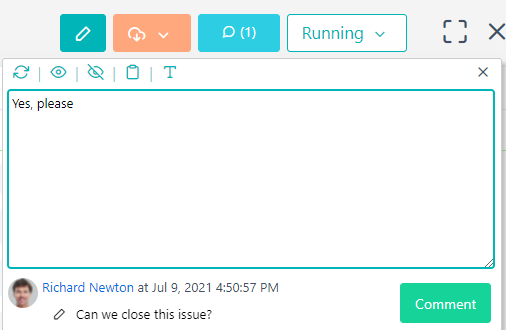
- Simply add a Comment using a simple or enriched HTML Editor (Open editor).
- Users can click on Refresh to see new comments; click on Show More or Show Less to see the number of comments they wish.
Only people and people in groups that are added in the “Send Notification to” field receive notifications in the Notifications Bar about these comments.
Add Project Requirements inside an Issue
Furthermore, users that have the right to view an Issue can also add Requirements of this Issue, in case this is relevant to a Project.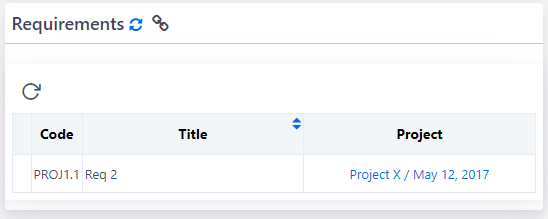
- Click on the + to add a new Requirement that may refer to a specific Project. A pop-up appears, where you may click on to select an already created project, set up a Title for the requirement, add the Code that refers to the Autonumber (per project), the Project Code, and the Date, choose Category, attach any documents from your Files and write down a Description. Press Create to proceed.
- Alternatively, select an already set Requirement that exists inside a Project, to attach it here in that Issue, by pressing. A pop-up appears, prompting you to select one from the already-added Requirements and click on Link.
- Being in the table of Requirements, you can Refresh the table to see the latest Requirement information; if it is fulfilled or not, its Code, Title, and in which Project has been set.
Massive Issues actions
- From the Packages Icon, go to Process Orchestration> Issues. A new Unit Action Tab opens with the name Issues.
- Then, in the List view of Issues, check multiple Issues, and perform actions upon them.
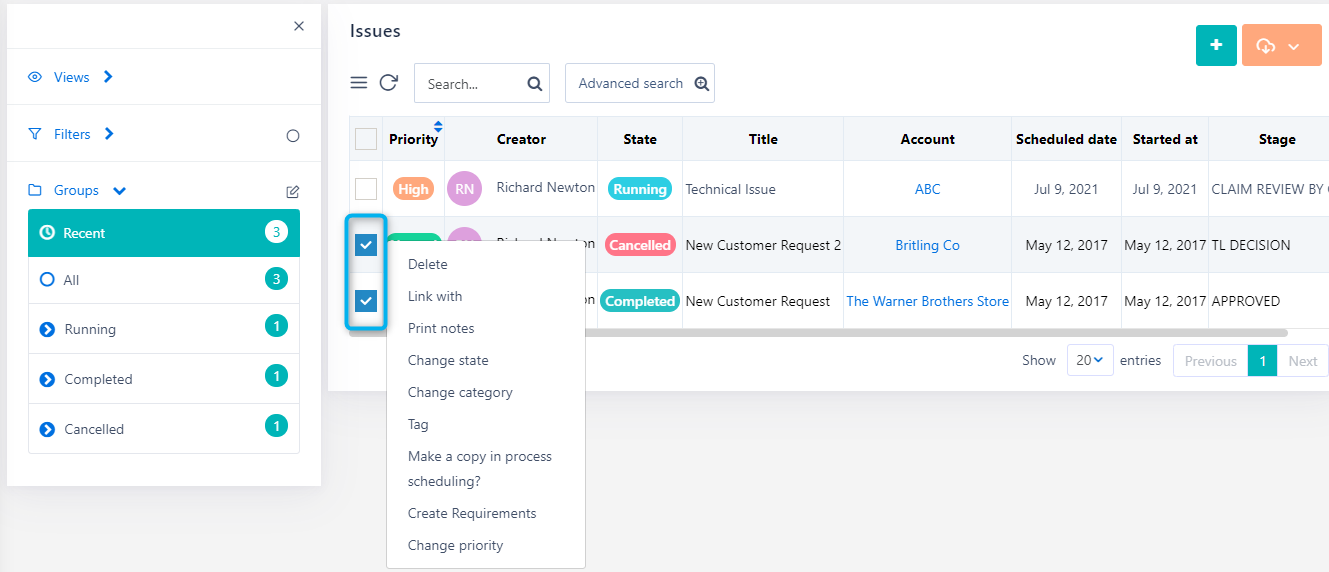
- Select multiple Issues and click on Delete to delete many Issues in one move. A check message appears in a pop-up window prompting you to be specific and check what Issues (and their sub-processes) you would like to delete. Choose between “Yes, delete all”, “Yes, but just those selected”, “No”.
- Select multiple Issues and click on Link with to Link the Issues with a Comidor entity, such as another Process, Opportunity, Survey, Project, Account, Contact, Message, File, etc. or select Tag to apply multiple tags at once.
- Select Print notes added on the discussion board of these Issues. Pop-up appears prompting you to select a timeframe of notes to report you are about to see/print.
- Select multiple Issues from the list and click on Change state. A new pop-up window appears. Click to expand the list, select one state and click on Ok. Changes will occur.
- Select multiple Issues from the list and click on the Change category. A new pop-up window appears. Click to expand the list, select one business category, and click on Ok. Changes will occur.
- Select to Make a copy in Process Scheduling, to copy this Issue and transfer it to Process Scheduling unit, where you can set a repetition for it.
- Click to Create Requirements for the selected Issue(s). A pop-up appears asking you to select an already added Project from your list, set up a requirement Code and then, a category for the Requirement.
- Finally, click on Change Priority, to change the priority of the issue
Print and Export multiple Issues
In the Issues, the main view, click on the Actions button and select between Export or Print buttons in order to export or print the list of the Issues that you are viewing at that moment or all. You can also Update durations
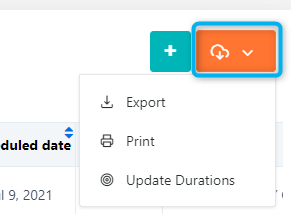
Make sure prior to this action that you are viewing the searched or filtered or all Issues after you have sorted them and/or grouped them by the way you wish. Check Data Management options for more information about all these options below.


